
Mastering Golden Hour Wedding Photography Techniques: A Professional Guide
The most coveted light in wedding photography is often the most technically unforgiving; it frequently exposes the gap between a lucky amateur and a disciplined professional. While many rely on the sun's natural warmth to do the heavy lifting, achieving a truly refined aesthetic requires more than just showing up at sunset. You've likely felt the frustration of watching a perfect sky turn into a wash of blown-out highlights or struggled with inconsistent exposures in a heavily backlit scene. It's a common challenge that can disrupt the flow of an otherwise flawless wedding day.
This guide explores the sophisticated golden hour wedding photography techniques required to transform these brief, golden moments into the cornerstone of an award-winning portfolio. We'll examine the technical precision of exposure management, the creative strategies for shaping light to create depth and separation, and the logistical planning necessary to organise your session so you never miss that narrow window of opportunity. By mastering these light-shaping strategies, you'll learn to produce the signature glow that distinguishes a high-end brand in a competitive market. We'll move beyond simple settings to treat the craft as both a serious discipline and a path to creative excellence.
Key Takeaways
Understand the atmospheric physics of low-angle light to predict scattering and exposure requirements with professional precision.
Master essential golden hour wedding photography techniques, moving beyond auto-exposure to protect highlight data in both the sky and skin tones.
Learn to use backlighting as a creative tool for creating subject separation and artistic flares that add depth to your portfolio.
Integrate advanced planning tools and scouting strategies to ensure wedding day logistics align perfectly with the peak sunset window.
Discover how to refine the final image in post-processing, using radial filters and shadow management to enhance the natural glow of the scene.
Table of Contents
The Science and Physics of Golden Hour Light
To master golden hour wedding photography techniques, one must first understand the physics that govern this fleeting phenomenon. Technically defined as the period shortly after sunrise or before sunset, the golden hour occurs when the sun sits at a low angle of elevation. During this time, light travels through a thicker layer of the Earth's atmosphere, which triggers a process known as atmospheric scattering. This scattering filters out shorter blue wavelengths, allowing the longer, warmer red and orange wavelengths to dominate the scene. For a deeper look into these physical properties, The Science of Golden Hour provides a comprehensive overview of the Rayleigh scattering effect that defines this period.
This light isn't just aesthetically pleasing; it's psychologically resonant. The warm tones often trigger an aspirational, nostalgic response in clients, making it a critical tool for building a high-end portfolio. Because the sun is low on the horizon, the light is highly directional, casting long, soft shadows that wrap around subjects to create natural depth and dimension that midday sun simply cannot replicate. It's a disciplined approach to light that separates the professional from the enthusiast.
The Three Phases of Sunset Light
Successful photographers categorise this time into three distinct stages. Pre-golden hour requires managing high-contrast light as the sun begins its descent; here, you're often fighting harsh highlights but gaining great clarity. Peak golden hour is the prized 20-minute window where the light is at its softest and most diffused. Finally, the transition to blue hour offers a cooler, ambient glow that creates a moody, sophisticated atmosphere for couples' portraits as the shadows deepen.
Kelvin Temperatures and Colour Theory
In technical terms, you're working within a 3000K to 4000K colour temperature range. This warm illumination is exceptionally flattering, as it complements human skin tones and naturally softens minor imperfections. By understanding colour theory, you can use the warm subject lighting to contrast against the cooler, blue-toned shadows in the background. This "colour pop" is a hallmark of professional work and a key element taught in our wedding photography courses. Mastering this balance ensures your imagery remains grounded in reality while feeling elevated and artistic.
Technical Configuration for High-Dynamic Range Portraits
Relying on your camera's internal light meter to make decisions during a sunset session is often a recipe for disappointment. Most auto-exposure systems are programmed to target a neutral grey, which frequently results in your subjects appearing as silhouettes or the sky losing its vibrant character. To truly master golden hour wedding photography techniques, you must transition to full manual control. This allows you to intentionally underexpose the scene slightly to protect the highlight data in the sky, a crucial step for maintaining that dreamy, high-end aesthetic. It's about taking command of the sensor's capabilities rather than letting the hardware guess your creative intent.
When you're looking for inspiration, Golden Hour Wedding Photo Ideas often showcase a perfect balance between subject and background. Achieving this requires shooting in RAW format. RAW files contain significantly more dynamic range than JPEGs, giving you the latitude to recover shadow detail on your couple's faces without introducing excessive noise. For White Balance, avoid the Auto setting. It will try to "correct" the beautiful golden tones back to neutral. Instead, manually set your Kelvin to around 6500K or 7500K to lock in that warmth and ensure consistency across your entire gallery. This technical consistency is what separates a professional portfolio from a collection of snapshots.
Exposure Bracketing and Subject Isolation
Precision is paramount when the light is changing by the minute. Light moves fast. Use spot metering on the couple's skin to establish a baseline, then adjust your shutter speed to ensure the brightest parts of the sky aren't clipping. Keep your ISO as low as possible, typically between 100 and 400, to maintain clean shadows and maximise the dynamic range of your sensor. If you find the contrast too high, consider a subtle fill flash or a reflector to bridge the gap between the sun and your subjects. This balance ensures your skin tones remain luminous while the background retains its rich, saturated colour.
Lens Selection for Depth and Compression
Your choice of glass dictates the emotional weight of the image. Fast primes, such as a 50mm or 85mm f/1.2, are staples for creating creamy bokeh that isolates the couple from busy backgrounds. Conversely, a telephoto lens like a 70-200mm provides lens compression, which makes the setting sun appear larger and more imposing behind the subjects. This effect adds a sense of grandeur and scale to the portrait session. If you're looking to refine your gear choices and technical execution, we recommend exploring our photography courses and workshops for hands-on guidance in high-stakes environments.
Advanced Lighting Techniques: Backlighting and Creative Flare
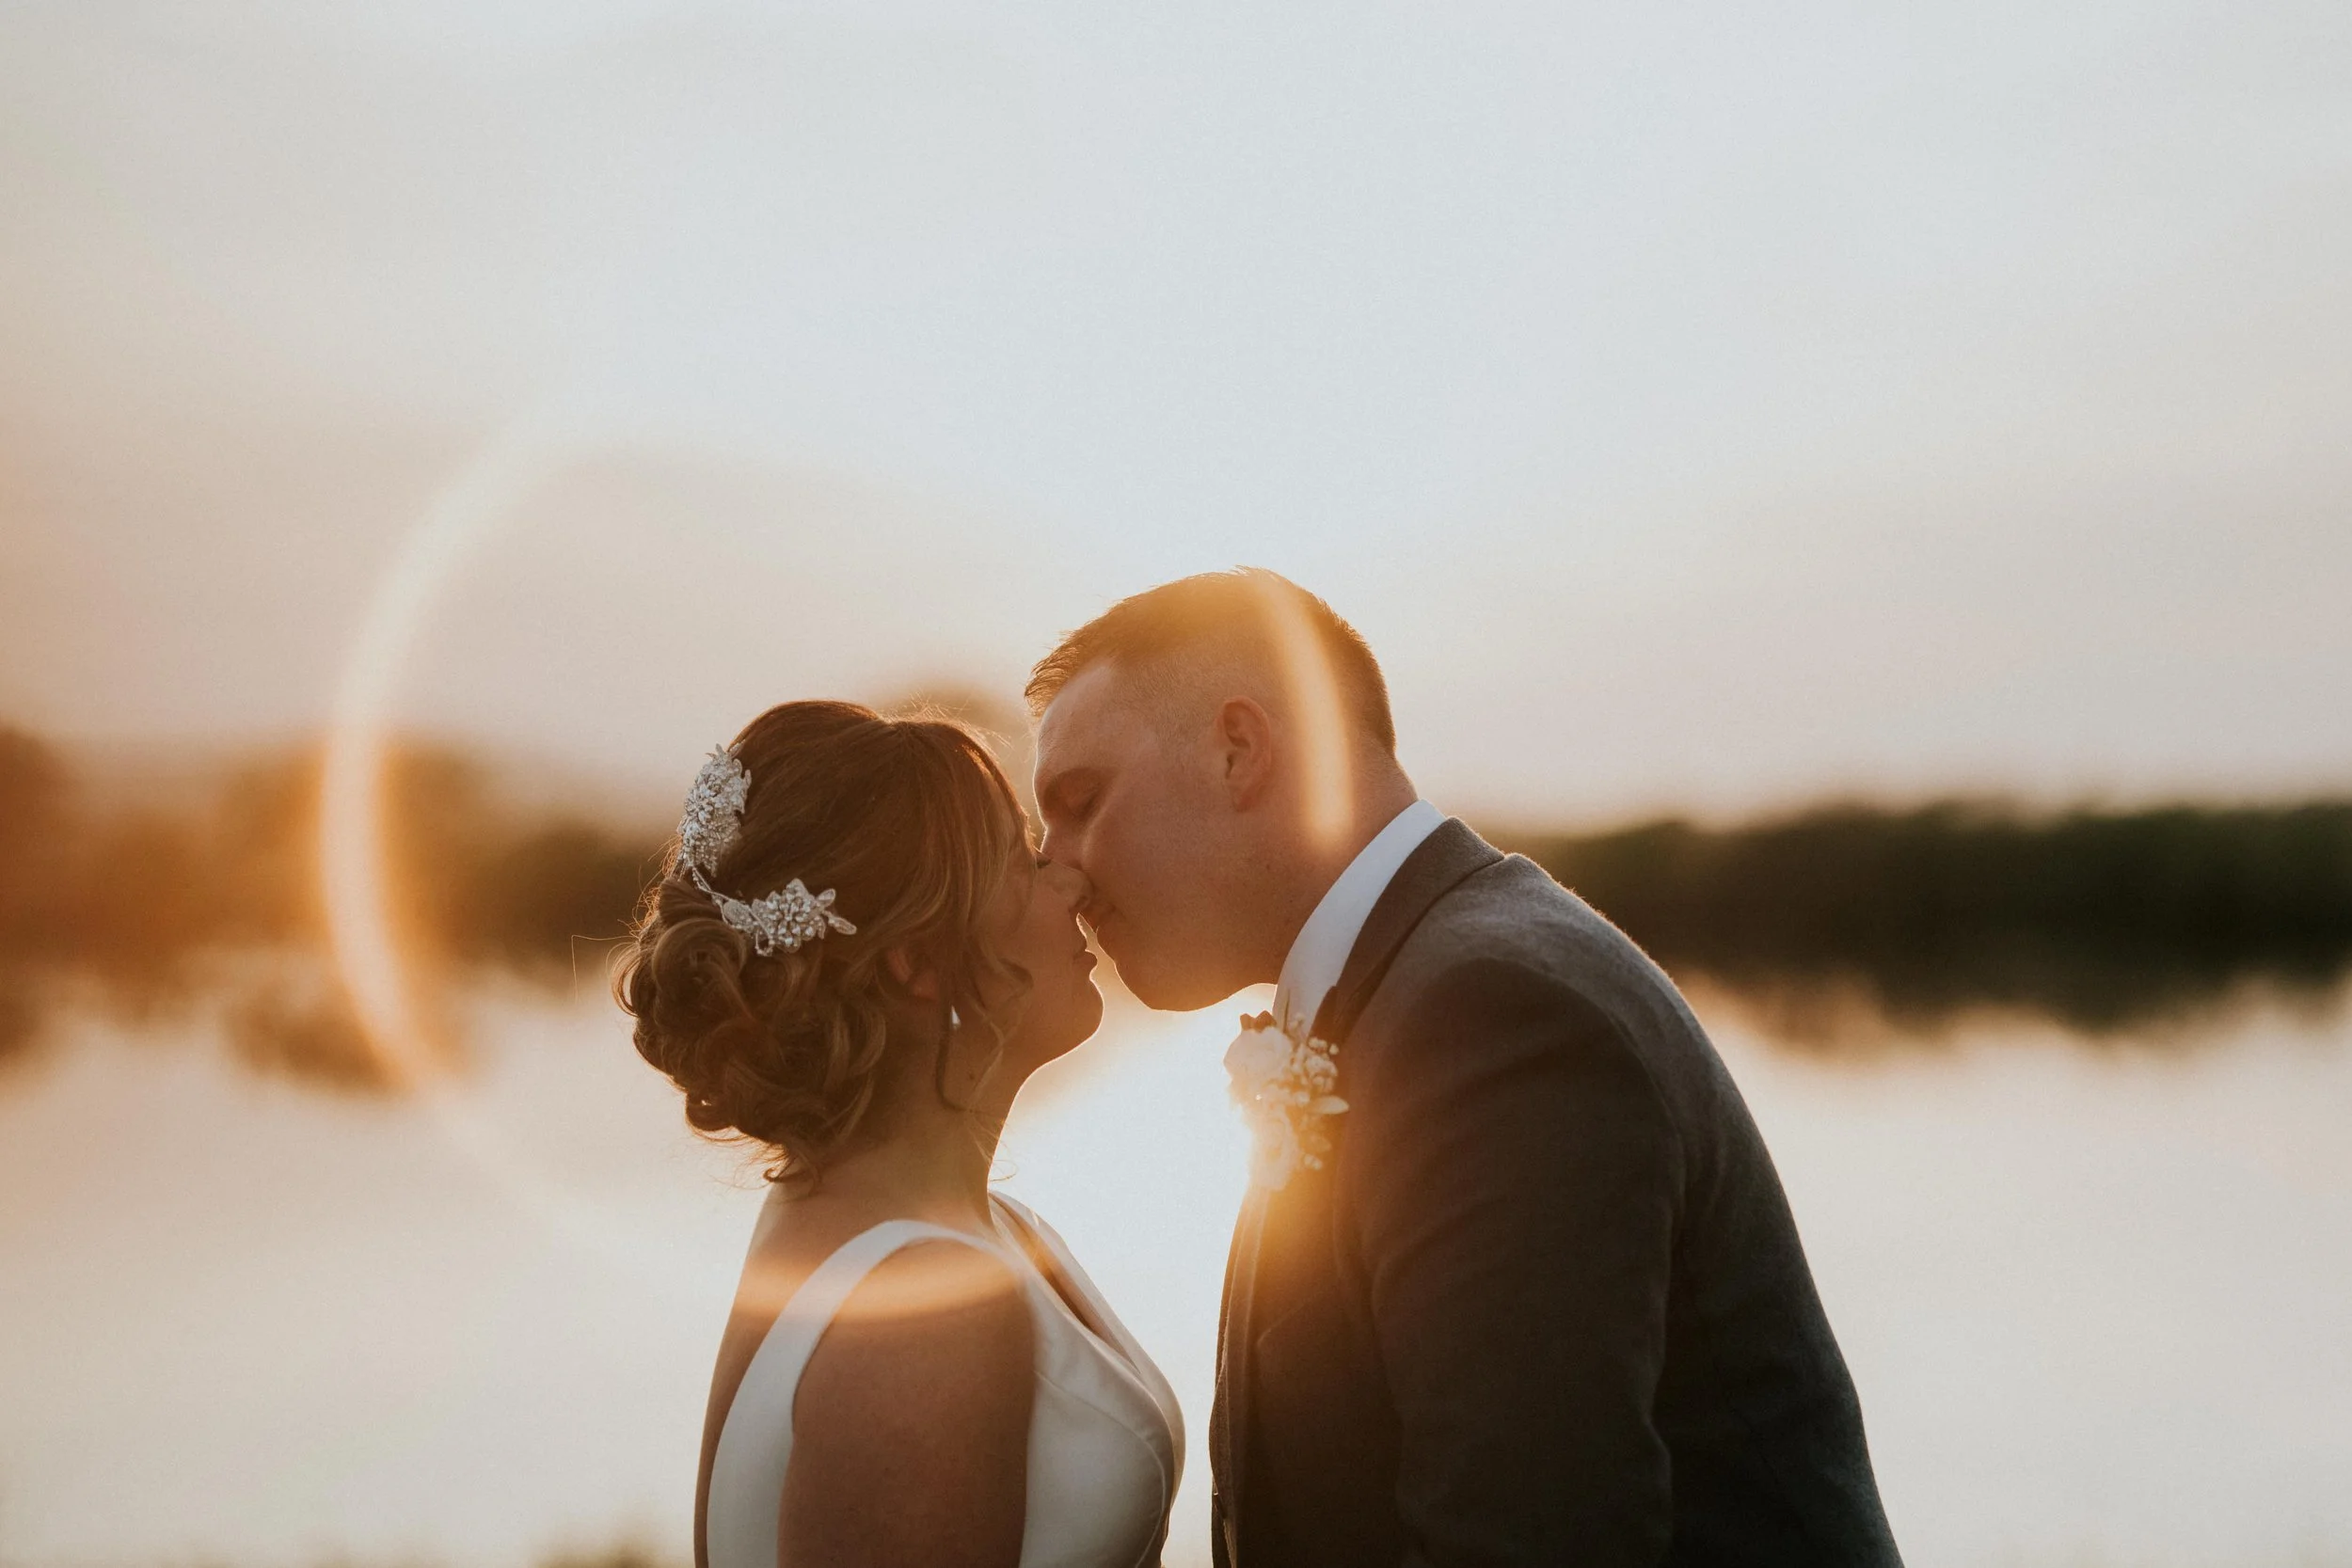
Moving beyond basic exposure, advanced golden hour wedding photography techniques involve active light manipulation to create a sense of three-dimensional depth. One of the most effective methods is the implementation of rim lighting. By positioning your subjects directly between the camera and the sun, you catch the low-angle rays on the edges of their hair and clothing. This creates a fine line of light that provides critical separation from the background, ensuring the couple doesn't blend into darker foliage or architecture. It's a hallmark of high-end portraiture that requires precise positioning and a keen eye for contrast.
While some photographers view lens flare as a technical flaw to be avoided, a professional learns to control it as a creative asset. Intentional flare adds a layer of ethereal romance to wedding imagery, but it must be managed with discipline. By subtly adjusting the angle of your lens relative to the sun, you can dictate the shape and intensity of light streaks across the frame. Small, incremental movements of the camera body can transform a distracting wash of light into a delicate, artistic element that guides the viewer's eye toward the subject.
The 'Peek-a-Boo' method is another sophisticated way to handle direct sunlight. Instead of letting the sun flood the entire frame, use textures like tree branches, architectural elements, or even the subjects themselves to partially obscure the light source. This technique breaks up the light, creating a starburst effect or a soft, dappled glow that feels more natural and less overwhelming. It's a deliberate way to shape the light's entry into your lens, adding a layer of complexity to your compositions that rewards a viewer's attention.
Managing Contrast with Reflectors and Fill
Balancing the intense backlight of a sunset with the need for luminous skin tones often requires supplementary tools. A gold reflector is an excellent choice for bouncing warmth back onto the couple's faces, maintaining the tonal harmony of the scene. In contrast, a silver reflector provides a crisper, more neutral fill that can help subjects pop in lower-contrast settings. If you prefer using artificial light, a subtle fill flash can bridge the gap. For more in-depth light-shaping tips, you might find our guide on Mastering the Craft particularly useful for elevating your professional vision.
The Art of the Professional Silhouette
When the sky offers a spectacular display of colour, a silhouette portrait can be more impactful than a traditional lit shot. The key lies in the posing. Because you're stripping away detail and relying on shape, you must ensure the couple's profiles are clear and recognisable. Look for negative space between their bodies to maintain a clean outline. Technically, you should expose for the brightest part of the sky, which naturally pushes the subjects into deep black. By keeping your ISO low, you ensure these blacks remain clean and free of digital noise, resulting in a striking, high-contrast image that commands attention in any award-winning portfolio.
Professional Planning and Workflow Management
The window for peak golden hour light is remarkably narrow, often lasting no more than twenty minutes. For the professional, this isn't just a time for creativity; it's a high-stakes logistical challenge that requires meticulous preparation. While an amateur might simply check the sunset time on their phone, a specialist uses sophisticated golden hour wedding photography techniques to map the sun's exact trajectory relative to the venue's architecture. Tools such as PhotoPills or The Photographer’s Ephemeris are essential for predicting where the sun will dip below the horizon and identifying potential 'light traps' where the glow might linger against a stone wall or through a treeline.
Managing client expectations is equally vital. You must explain the 'window of opportunity' during the pre-wedding consultation, ensuring the couple understands that we're chasing a specific quality of light. If the wedding breakfast runs late, the light won't wait. By establishing this importance early, you ensure the couple is ready to move the moment the conditions are right. Once on-site, a rapid-fire workflow is necessary. You don't have time for complex lighting setups; instead, you must have a mental catalogue of poses that work with the shifting angles of the sun as it nears the horizon.
Scouting for Sunset Success
Scouting should happen well before the wedding day, ideally at the same time of year to account for seasonal sun positions. Look for locations where the sun lingers longest, such as elevated ridges or open west-facing fields. Pay attention to how the light interacts with local textures; golden light hitting Cotswold stone or long meadow grass creates a vastly different mood than light reflecting off a city skyline. These golden hour wedding photography techniquesextend beyond the camera settings to the physical environment. Given the unpredictable British weather, always have a high-end Plan B. This might involve identifying an indoor 'light trap' like a large west-facing window that can still capture that warmth if the wind picks up outdoors.
Directing Clients in High-Stakes Light
Communication during the peak window needs to be clear and high-energy. You're directing a couple who may be tired after a long day, so your enthusiasm must carry the session. When posing for the sun, avoid the 'squint' by having the couple close their eyes or look at each other until the moment you're ready to shoot. This keeps their expressions natural and relaxed even in bright, direct light. To refine these skills in a real-world setting, we invite you to explore our wedding photography training dates UK for live shoot experience. Mastering these logistical elements ensures that when the perfect light arrives, you're ready to capture it with confidence.
Refining the Vision: Post-Processing and Portfolio Impact
The digital darkroom is where the technical precision of your on-site work is polished into a cohesive professional vision. While the capture phase establishes the foundation, post-processing allows you to accentuate the light's natural direction and depth. Using golden hour wedding photography techniques during the edit often involves the strategic application of radial filters to mimic the sun's fall-off. By subtly increasing the warmth and exposure within a feathered mask, you can guide the viewer's eye toward the couple while maintaining the integrity of the surrounding landscape. This isn't about inventing light that wasn't there; it's about refining the raw data to match the emotional resonance of the moment.
A critical decision in this phase is the balance between shadow recovery and mood. While modern sensors allow for significant detail retrieval in dark areas, over-recovering shadows can lead to a flat, unnatural appearance that lacks the gravitas of a professional portrait. Sometimes, keeping the shadows deep and rich adds a necessary layer of drama and sophistication. This disciplined approach to contrast ensures your imagery stands out in a market often saturated with overly bright, low-contrast edits. Mastering this balance is a key component in securing prestigious wedding photography awards, as it demonstrates a sophisticated understanding of light physics and artistic intent.
Colour Grading for Professional Elegance
Consistency is the hallmark of a high-end brand. To achieve this, many professionals employ split toning, adding subtle warmth to the highlights while introducing cooler, complementary tones into the shadows. This creates a colour pop that makes the subjects feel luminous against the environment. However, you must be meticulous with skin tones. It's easy to let the golden light turn complexions an unnatural orange. A professional edit preserves the warmth of the sunset while ensuring the couple's skin remains healthy and realistic. For a broader look at current industry standards, you can read our Definitive Guide to Modern Wedding Photography.
Building a Signature Portfolio
The commercial value of a well-executed sunset session cannot be overstated. These 'Hero' shots often serve as the primary draw for your website gallery, as they represent the aspirational quality that high-budget clients seek. By showcasing a mastery of golden hour wedding photography techniques, you position yourself as a specialist capable of handling high-stakes lighting with composure. This technical reliability directly translates into higher booking rates and the ability to command premium fees. The journey toward this level of excellence is a hallmark of an Institute of Wedding Photographers professional, where the craft is treated as a serious discipline and a viable, rewarding career path.
Elevating Your Artistry Through Light
The transition from an enthusiast to a certified professional requires a commitment to technical excellence and a deep understanding of environmental variables. Mastering the fleeting beauty of sunset is more than just a creative choice; it's a disciplined exercise in light physics and logistical management. By integrating these advanced golden hour wedding photography techniques into your workflow, you ensure that your portfolio reflects a standard of quality that commands industry respect. It's a process that rewards patience and supports those who treat the craft as a serious discipline.
If you're ready to move beyond theory and practice in high-stakes environments, we invite you to elevate your professional vision at our next photography workshop. Our programmes provide portfolio-building days in iconic UK locations and direct mentorship from award-winning wedding photographers. You'll also gain access to the prestigious IOWP community, offering the formal validation and peer support necessary for sustained career progression. Your journey toward mastery is a path we are proud to guide, ensuring your talent receives the professional recognition it deserves.
Frequently Asked Questions
What time is golden hour in the UK during summer?
In the United Kingdom, summer golden hour typically occurs between 20:30 and 21:30 during the peak months of June and July. Because the sun sets much later in the northern hemisphere during this period, you must coordinate with the wedding's schedule to ensure the couple is available after the wedding breakfast. Timing varies slightly depending on your specific latitude, so using a tracking app is the most reliable way to plan your session.
What are the best camera settings for golden hour wedding portraits?
The best settings involve using Manual mode to maintain full control over the exposure triangle. Set your ISO as low as possible, usually ISO 100, to ensure maximum dynamic range and clean shadows. Use a wide aperture like f/1.8 or f/2.8 to isolate your subjects, then adjust your shutter speed until the highlights in the sky are preserved without losing too much detail on the faces.
How do I avoid lens flare when shooting directly into the sun?
You can avoid unwanted lens flare by using a high-quality lens hood or by positioning your subjects so they partially block the sun. Subtle changes in your camera's angle can also move the flare away from critical areas like the couple's faces. If the flare is too dominant, try the 'peek-a-boo' method by using a tree branch or architectural edge to diffuse the light source before it enters your lens.
Do I need to use a flash for golden hour photography?
You don't strictly need a flash, but using a subtle fill can significantly improve your results when applying golden hour wedding photography techniques. A low-power speedlight or a gold reflector helps lift the shadows on the couple's faces, balancing them against the bright background. This technique ensures skin tones remain luminous while the sky retains its rich, saturated colours.
What is the best lens for capturing sunset wedding photos?
An 85mm prime lens is widely considered the best choice for sunset portraits due to its flattering compression and ability to create a creamy background. This focal length allows you to stay at a comfortable distance while making the sun appear larger in the frame. A 50mm prime is a versatile alternative, offering a natural field of view that works well for wider, environmental compositions.
How do I stop my subjects from squinting in the bright sun?
To prevent squinting, position the couple so the sun is behind them, creating a beautiful rim light rather than direct illumination on their faces. You can also ask them to keep their eyes closed or look at each other, only looking toward the camera for a brief moment when you're ready to capture the frame. This keeps their expressions relaxed and natural even in bright conditions.
Can I shoot golden hour portraits on a cloudy day in the UK?
You can still shoot during this window on a cloudy day, though the results will be different. The clouds act as a massive softbox, creating a diffused, even light that is very flattering but lacks the directional glow of a clear sunset. While you won't get the same golden flare, the light remains soft and cool, which is ideal for a more moody, documentary style of portraiture.
How do I edit golden hour photos to look professional and natural?
Professional editing involves using radial filters to enhance the natural direction of light while keeping the colour palette balanced. Be careful not to let the warmth turn the skin tones too orange; instead, use selective saturation and white balance adjustments to keep complexions looking natural. Refining these golden hour wedding photography techniquesin post-processing ensures your gallery looks consistent and sophisticated.