
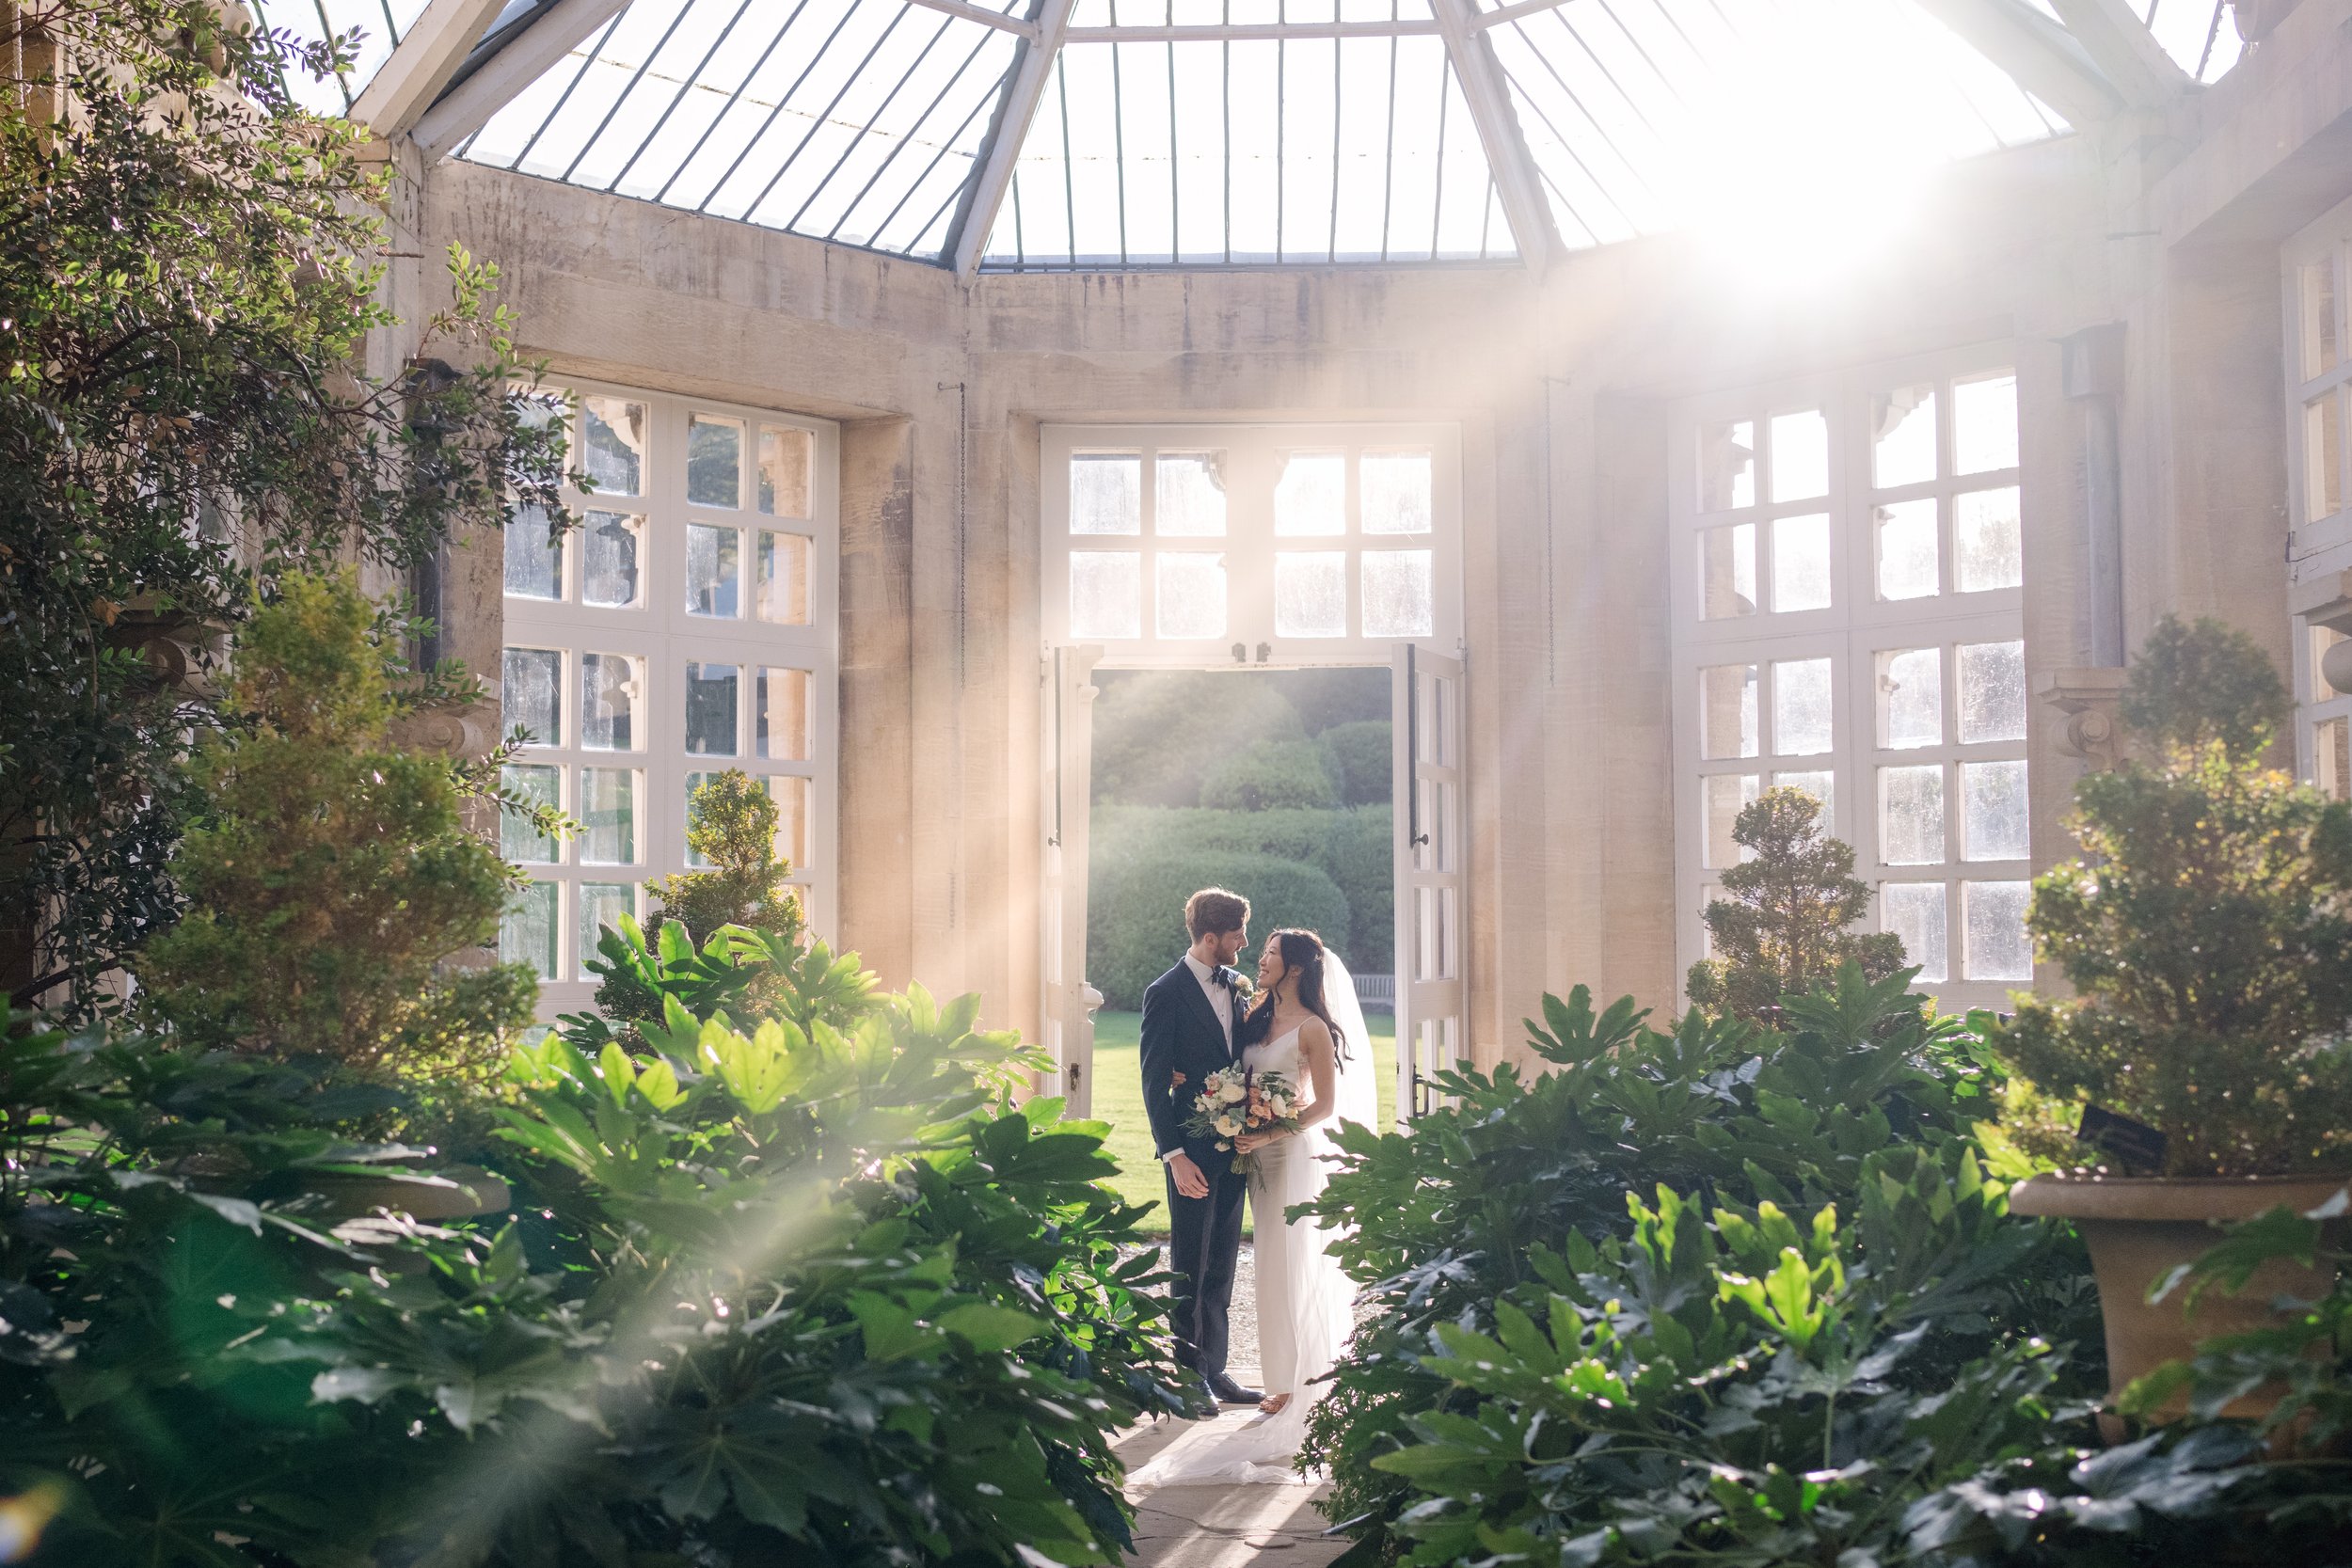
Bright sunlight doesn’t have to cost you detail or atmosphere. To learn how to shoot in harsh sunlight, seek open shade, manage exposure to preserve highlights, and use the direction of the light deliberately. The UK Government advises avoiding the sun when it’s strongest, typically between 11am and 3pm, and seeking shade. Open shade is a spot where something blocks direct sun while your subject remains outside that object’s shadow.
If strong sun creates squinting, deep shadows or washed-out highlights, the scene is still usable. The key is to control the contrast and preserve important detail in the brightest parts of the image.
This guide explains how to shoot in harsh sunlight by positioning your subject in open shade, setting exposure to protect highlights and diffusing direct light when needed. It also covers creative approaches, including colour and black-and-white, to help you make confident decisions as conditions change.
Key Takeaways
Choose light that gives your subject even illumination, and watch for patches of direct sun that create uneven exposure.
Use contrast, shape and tonal separation to make strong sunlight a deliberate choice in black-and-white photographs.
Adjust exposure with the brightest important details in mind, then assess how your camera’s metering responds to the scene.
Shooting in RAW gives you more flexibility to work with light and dark areas during processing.
Soften direct sunlight with diffusion or use the surroundings to create a more controlled lighting setup.
Table of Contents
Why is photography in bright sunlight so difficult?
Direct sun creates strong contrast, with bright highlights beside deep shadows. Use these steps to assess the light and manage its effect on your subject.
Assess Midday Light and Shaded Areas
Check the sun’s position before choosing where your subject will stand. Near noon, overhead light makes it harder to place the sun behind someone or find open shade, while direct light can create shadows beneath the eyes and nose. To protect your subject from strong sunlight, avoid the sun when it is strongest, typically between 11am and 3pm, and seek shade, according to the UK Government.
Look for split light across the scene: one side of a face may be bright while the other is shaded. Move the subject until their face and clothing are lit consistently, without a patch of direct sun crossing them.
Block Direct Light and Reduce Shadows
Move your subject into open shade, such as beside a building that blocks direct sun without placing them beneath a dark roof. Check the face and background together: a bright background behind a shaded subject can be difficult to balance. Trees can provide shade, but foliage may cast uneven patches across skin and clothing.
Use fill flash or a reflector to soften harsh shadows. Angle a reflector to bounce light towards the shadowed side of the face, then check that the result still has dimension. For a couple’s portrait, position them so one person can shade the other without creating a distracting shadow.
Prevent Lens Flare Toward the Sun
Use a lens hood when shooting towards the sun to help block stray light from reaching the lens. Check the viewfinder for veiling glare or bright spots, then adjust your angle or place the sun behind an object. A doorway or building edge can shield the lens while keeping the sunlit setting in the frame.
Keep the front element clean, as smudges can make flare more noticeable. If you want flare in the image, position it deliberately and check that the subject’s face retains detail.
Choose an ND filter when bright conditions prevent the shutter speed or aperture you want. A variable ND filter allows adjustable light reduction, while fixed-strength filters offer a set reduction; UK prices vary with filter size, strength and construction. Check the filter’s effect through the viewfinder, especially when using a variable filter at stronger settings.
Keep your camera out of prolonged direct sun between photographs, and store it in a shaded place. Choose shade for your subject rather than asking them to remain in intense sun. The Scottish Government notes that sunlight is weakest in the early morning and late afternoon. If you use flash or a reflector, check that the light softens shadows without making the subject squint.
Black-and-white photography in strong sunlight
Use monochrome intentionally: strong sunlight can turn clear tonal differences into a purposeful composition. These steps help you plan, capture and assess black-and-white images without relying on colour to separate the subject from the scene.
Identify shapes and tones before framing the photograph. A white dress against a pale wall may merge into one bright area, while the same dress against a dark doorway stands out. Look for strong lines, textured surfaces and clear boundaries between light and dark. In a street portrait, for example, a sunlit pavement can lead the eye towards a subject against a shaded building.
Decide where the brightest and darkest areas should fall in the composition. Harsh shadows can define a face, garment or architectural edge, but they can also hide important detail. Check the subject’s eyes and expression, then adjust their angle or position if a shadow falls awkwardly across them. A profile beside a bright window may create a clear silhouette; a front-facing portrait may need more even light.
Decide whether to make a monochrome image before pressing the shutter. If your camera offers a black-and-white preview, use it to assess tones while composing. When recording RAW files, the preview may appear monochrome while the file retains colour information for later conversion. You can then refine contrast and brightness in processing rather than committing to a single in-camera rendering.
Use the camera’s monochrome preview to assess highlights, shadows and mid-tones. A bright shirt beside a dark jacket can lose texture if both become featureless white and black. Review the histogram or highlight warning, then adjust exposure or framing if important detail disappears. In a wedding-party portrait, check pale clothing against darker suits before moving on.
Compare the monochrome conversion with the original colour image during editing. Adjust tonal contrast carefully so skin retains gradation and fabric remains distinct; increasing contrast indiscriminately can erase detail in both highlights and shadows. Try different colour-channel mixes to change how coloured surfaces translate into grey tones. Photographers developing this judgement across wedding scenes can explore wedding photography courses and workshops.
Exposure settings and protecting highlights
Bright sunlight can put a shaded subject and a sunlit background beyond the range one exposure can capture well. Learning how to shoot in harsh sunlight starts with deciding which details matter most, then comparing the camera’s meter reading with the actual scene.
Match Subject and Background Exposure
Position the subject where the light is closer in brightness to the background, such as beside the shaded side of a building. Check the face and the area behind it through the viewfinder. A bright background can make the subject appear too dark, while a much darker background may draw attention away from them.
If the scene is still too bright in some areas and too dark in others, decide which detail matters most. For a portrait, expose for the face and let less important background areas appear lighter or darker. Avoid placing the subject against a bright surface if preserving its texture is essential.
Choose the Right Exposure
Watch highlights on skin, pale clothing and reflective surfaces to preserve detail. Take a test frame, then review the histogram or highlight warning for areas that have lost texture. If a wedding dress becomes featureless white, reduce exposure and take another frame.
Use exposure compensation as a considered adjustment, not a fixed recipe. In harsh light, one photographer may favour a setting between 0 and -0.3, while another may add 0.3 exposure for the desired result. Check the captured image, since subject position and background brightness affect the decision.
Set Exposure Manually
Switch to manual exposure when changing compositions cause the camera to alter brightness unexpectedly. Set ISO 100 as a starting point, then try 1/400 second and f/4.0 as an initial exposure in bright conditions. These settings are a reference, not a prescription; adjust shutter speed or aperture after checking important highlights.
Balance ISO, shutter speed and aperture. A faster shutter speed and a smaller aperture both reduce the light reaching the sensor, while the smaller aperture also increases depth of field. If the subject is moving, prioritise a shutter speed that keeps them clear, then adjust the other settings.
Choose a Metering Mode for High-Contrast Sunlight
Use spot metering when you want the camera to measure a specific part of the scene, such as a face against a bright background. Place the metering point over the subject, take a frame and inspect it. When learning how to shoot in harsh sunlight, meter again if the light or framing changes.
Evaluative or matrix metering can be a useful starting point when both subject and background matter. In dappled light, underexposing by 1-2 stops can help balance bright and shaded areas. Review the image, since a face in deep shade may need a different exposure. For structured practice, explore photography training.
Camera dynamic range and shooting raw
A camera can record only a limited brightness range in one exposure. Shooting RAW gives you more flexibility when processing light and dark areas, but it cannot restore detail that was never captured.
Assess the brightest and darkest parts of the scene before taking the photograph. At midday, a white dress in direct sun beside a shaded face may exceed the camera’s dynamic range. Decide which details matter most, then reframe or reposition the subject to reduce the brightness difference.
Record images in RAW when you expect to adjust tonal detail during processing. Unlike a finished JPEG, a RAW file retains more information for working with bright and dark areas. This flexibility can help with a wedding portrait that has a sunlit background and shaded clothing, but it cannot recover every detail in the scene.
Protect highlights that matter, especially in pale fabric, skin and reflective surfaces. After a test frame, review the camera’s highlight warning: flashing areas indicate where detail may be lost. If important texture disappears, reduce exposure or change the composition. Don’t make the entire subject too dark just to preserve an unimportant bright patch.
Process the RAW file in a controlled sequence. Set overall exposure first, then adjust highlights and shadows separately while checking the subject’s skin and clothing. For example, lower the highlights on a bright wedding dress before lifting detail in a dark suit. Stop if the lifted shadows look noisy or unnatural, and compare the edit with the original.
Use the camera’s dynamic range as a reason to shape the light, not as a substitute for doing so. If the gap between a bright sky and shaded subject is still too wide, change your angle, wait for cloud cover or move the subject. A portrait near sunset may have softer contrast than one at midday, making the scene easier for the camera to capture.
Use a consistent workflow throughout a sequence of photographs. Check that RAW capture is selected before the session, then review a test image whenever the light changes. A couple moving from a shaded doorway into bright surroundings may need a new exposure and processing approach. This review helps preserve highlights without making faces or darker garments look unflattering.
Diffusing harsh sunlight
Soften direct sunlight before changing your camera settings. A diffuser alters the quality of light on your subject, reducing contrast while retaining the direction and shape that give a portrait character.
Place a diffuser between the sun and your subject, then check that it covers the face and clothing evenly. A small panel may soften facial light but leave bright patches on the shoulders or dress. Reposition it so the subject is fully within the diffused area, and watch for shifting shadows as the sun or subject moves.
Adjust the diffuser’s position to control its effect. Bringing it closer to the subject creates softer, more even light across the face; moving it farther away can leave stronger contrast. Ask an assistant to hold it securely outside the frame, then check the edges of the composition for supports or unwanted shadows.
Look for natural diffusion before setting up extra equipment. Thin cloud can soften direct sun, while a doorway can create a transition between bright exterior light and a shaded interior. Position the subject near the doorway and adjust their distance until their face retains detail without looking much darker than the background.
Use diffusion to refine the direction of light, not erase it. Keep the sun coming from one side and place the diffuser between the light and your subject. This preserves gentle definition on the face while softening harsh shadows. In a wedding portrait, retain enough directional light to distinguish the veil, jacket or bouquet from its surroundings.
Assess the complete frame after placing the diffuser. Check skin, pale fabric and the background, then adjust the subject or diffuser if one area remains much brighter. If the sun is low, its golden light can still create a strong composition; diffusion helps control the contrast while retaining that warm direction. To develop practical lighting judgement, explore POSE, LIGHT & FIRE photography events.
A doorway can help when photographing in harsh sunlight. Use the change in light at the threshold to position your subject while keeping their face clearly visible.
Institute of Wedding Photographers
The Institute of Wedding Photographers helps wedding photographers develop their craft through education, portfolio building and mentorship. If you want to apply these lighting techniques more consistently, structured learning can help you refine exposure decisions and assess your images with a professional perspective.
The Wedding Photography Mentorship Program supports ongoing development, while the Wedding Photography Portfolio Builder Workshop offers a focused way to strengthen your portfolio. IOWP Awards and Membership provide another way to engage with professional recognition. Choose the option that matches your goals, whether you’re practising foundational skills or developing work for a competitive portfolio.
Explore the Institute of Wedding Photographers’ training and mentorship options to develop your wedding photography skills.
Take Your Lighting Practice Further
Every challenging lighting situation is an opportunity to strengthen your judgement and develop a more considered visual style. As you practise how to shoot in harsh sunlight, use the results to identify which decisions suit your approach, from shaping light on location to preserving detail in a finished image.
For a practical next step, the Institute of Wedding Photographers offers learning opportunities including the 4 Day Photography Workshop at Ceconi Castle, the Wedding Photography Portfolio Builder Workshop and the Wedding Photography Mentorship Program. These options support different stages of development, whether you’re building experience, refining your portfolio or seeking continuing guidance.
Choose an opportunity that aligns with the skills you want to develop, and carry that learning into your next assignment. Contact Institute of Wedding Photographers to discuss your next step. With deliberate practice, difficult light can become a setting in which your creative judgement grows.
Frequently Asked Questions
What is “Open Shade”?
Open shade is an area where an object blocks direct sunlight while the subject remains outside its shadow. For example, position someone beside a building rather than beneath a dark overhang. Check the light on their face and the brightness behind them. A nearby pale wall can reflect light towards the shaded subject and soften the contrast.
What camera settings work best for shooting in harsh sunlight?
No single combination of settings suits every bright scene. Choose a shutter speed that controls subject movement, then adjust the aperture for your preferred depth of field. Keep ISO low when the available light allows, and review a test frame before continuing. For a moving couple, prioritise a shutter speed that keeps them sharp, then refine exposure without losing important detail.
How do you expose correctly in bright sunlight without clipping highlights?
Protect highlights that contain important texture, such as a white dress, clouds or sunlit skin. A tiny reflection with no detail may clip without harming the photograph, but broad, featureless areas can distract. Take a test image and inspect the brightest meaningful areas during playback. If detail has vanished, reduce exposure or change your angle so less direct light hits that surface.
When should you use a reflector or diffuser in direct sunlight?
Use a diffuser when direct sun creates hard facial contrast and you can place it between the light and your subject. Choose a reflector when the subject is in shade and needs light bounced into darker areas. Beside a bright wall, for example, a reflector can lift the shadowed side of the face. Keep either tool outside the frame and check that it doesn’t create uneven patches.
What is the best time of day to avoid harsh sunlight for photography?
According to the Scottish Government, sunlight is generally less intense in the early morning and late afternoon than at midday. The sun’s lower position can also create longer, more directional shadows, which may suit portraits or landscapes. Cloud cover can change the light quickly, so assess the scene rather than relying on the clock. Allow time to adjust your framing as conditions shift.
How do you use fill flash in bright sunlight?
Use fill flash to brighten deep shadows caused by direct sunlight, rather than replace the ambient light. First set exposure for the surroundings, then add flash to lift the subject’s face. Take a test frame and adjust flash output if the result looks flat or unnaturally bright. For a group portrait, check that the flash reaches faces evenly across the frame.
What ND filters are useful for photography in harsh sunlight, and how much do they cost in the UK?
A variable ND filter lets you adjust light reduction, while a fixed-strength filter provides a set reduction. UK prices vary with filter size, strength and construction.