
Long Exposure Photography: A Complete Guide for Beginners in 2026
The ethereal effect of silky water or the dynamic energy of light trails represents a captivating goal for many aspiring photographers. Yet, the path to achieving such images through long exposure photography is often obscured by technical complexities and frustrating initial results. Terminology like 'ND filters' and 'bulb mode' can feel intimidating, while early attempts may yield little more than blurry or overexposed frames. This need not be a source of discouragement; it is simply a sign that a foundational understanding is required.
This comprehensive guide is designed to provide that foundation, demystifying the process from start to finish. Here, you will learn to identify the essential equipment, to configure your camera settings with confidence, and to apply a repeatable workflow for capturing breathtaking images. Whether your ambition is to render serene coastal landscapes, trace the paths of city traffic, or chart the movement of stars, this guide will equip you with the knowledge to refine your technique and elevate your portfolio.
Key Takeaways
Assemble the foundational toolkit required to control light and time, distinguishing between essential equipment and optional accessories.
Learn a structured, repeatable workflow for your camera settings, ensuring you establish sharp focus and strong composition before managing the exposure.
Receive the starting camera settings and professional guidance needed to capture classic long exposure subjects, including ethereal water and dynamic light trails.
Move beyond the technical steps to refine your artistic vision, using compositional principles to create more compelling and impactful photographs.
Understanding Long Exposure: The Art of Capturing Time
In conventional photography, the goal is to freeze a fraction of a second, capturing a single, decisive moment. Long exposure photography, however, operates on a fundamentally different principle. It is the art of using a slow shutter speed to intentionally record the passage of time within a single frame. For a detailed technical overview, you can explore this resource on What is Long Exposure Photography?. The creative result is a compelling paradox: stationary objects like buildings or rocks remain perfectly sharp, while any elements in motion are transformed into graceful blurs or ethereal streaks. This technique moves beyond documentation, allowing the photographer to interpret a scene rather than merely record it.
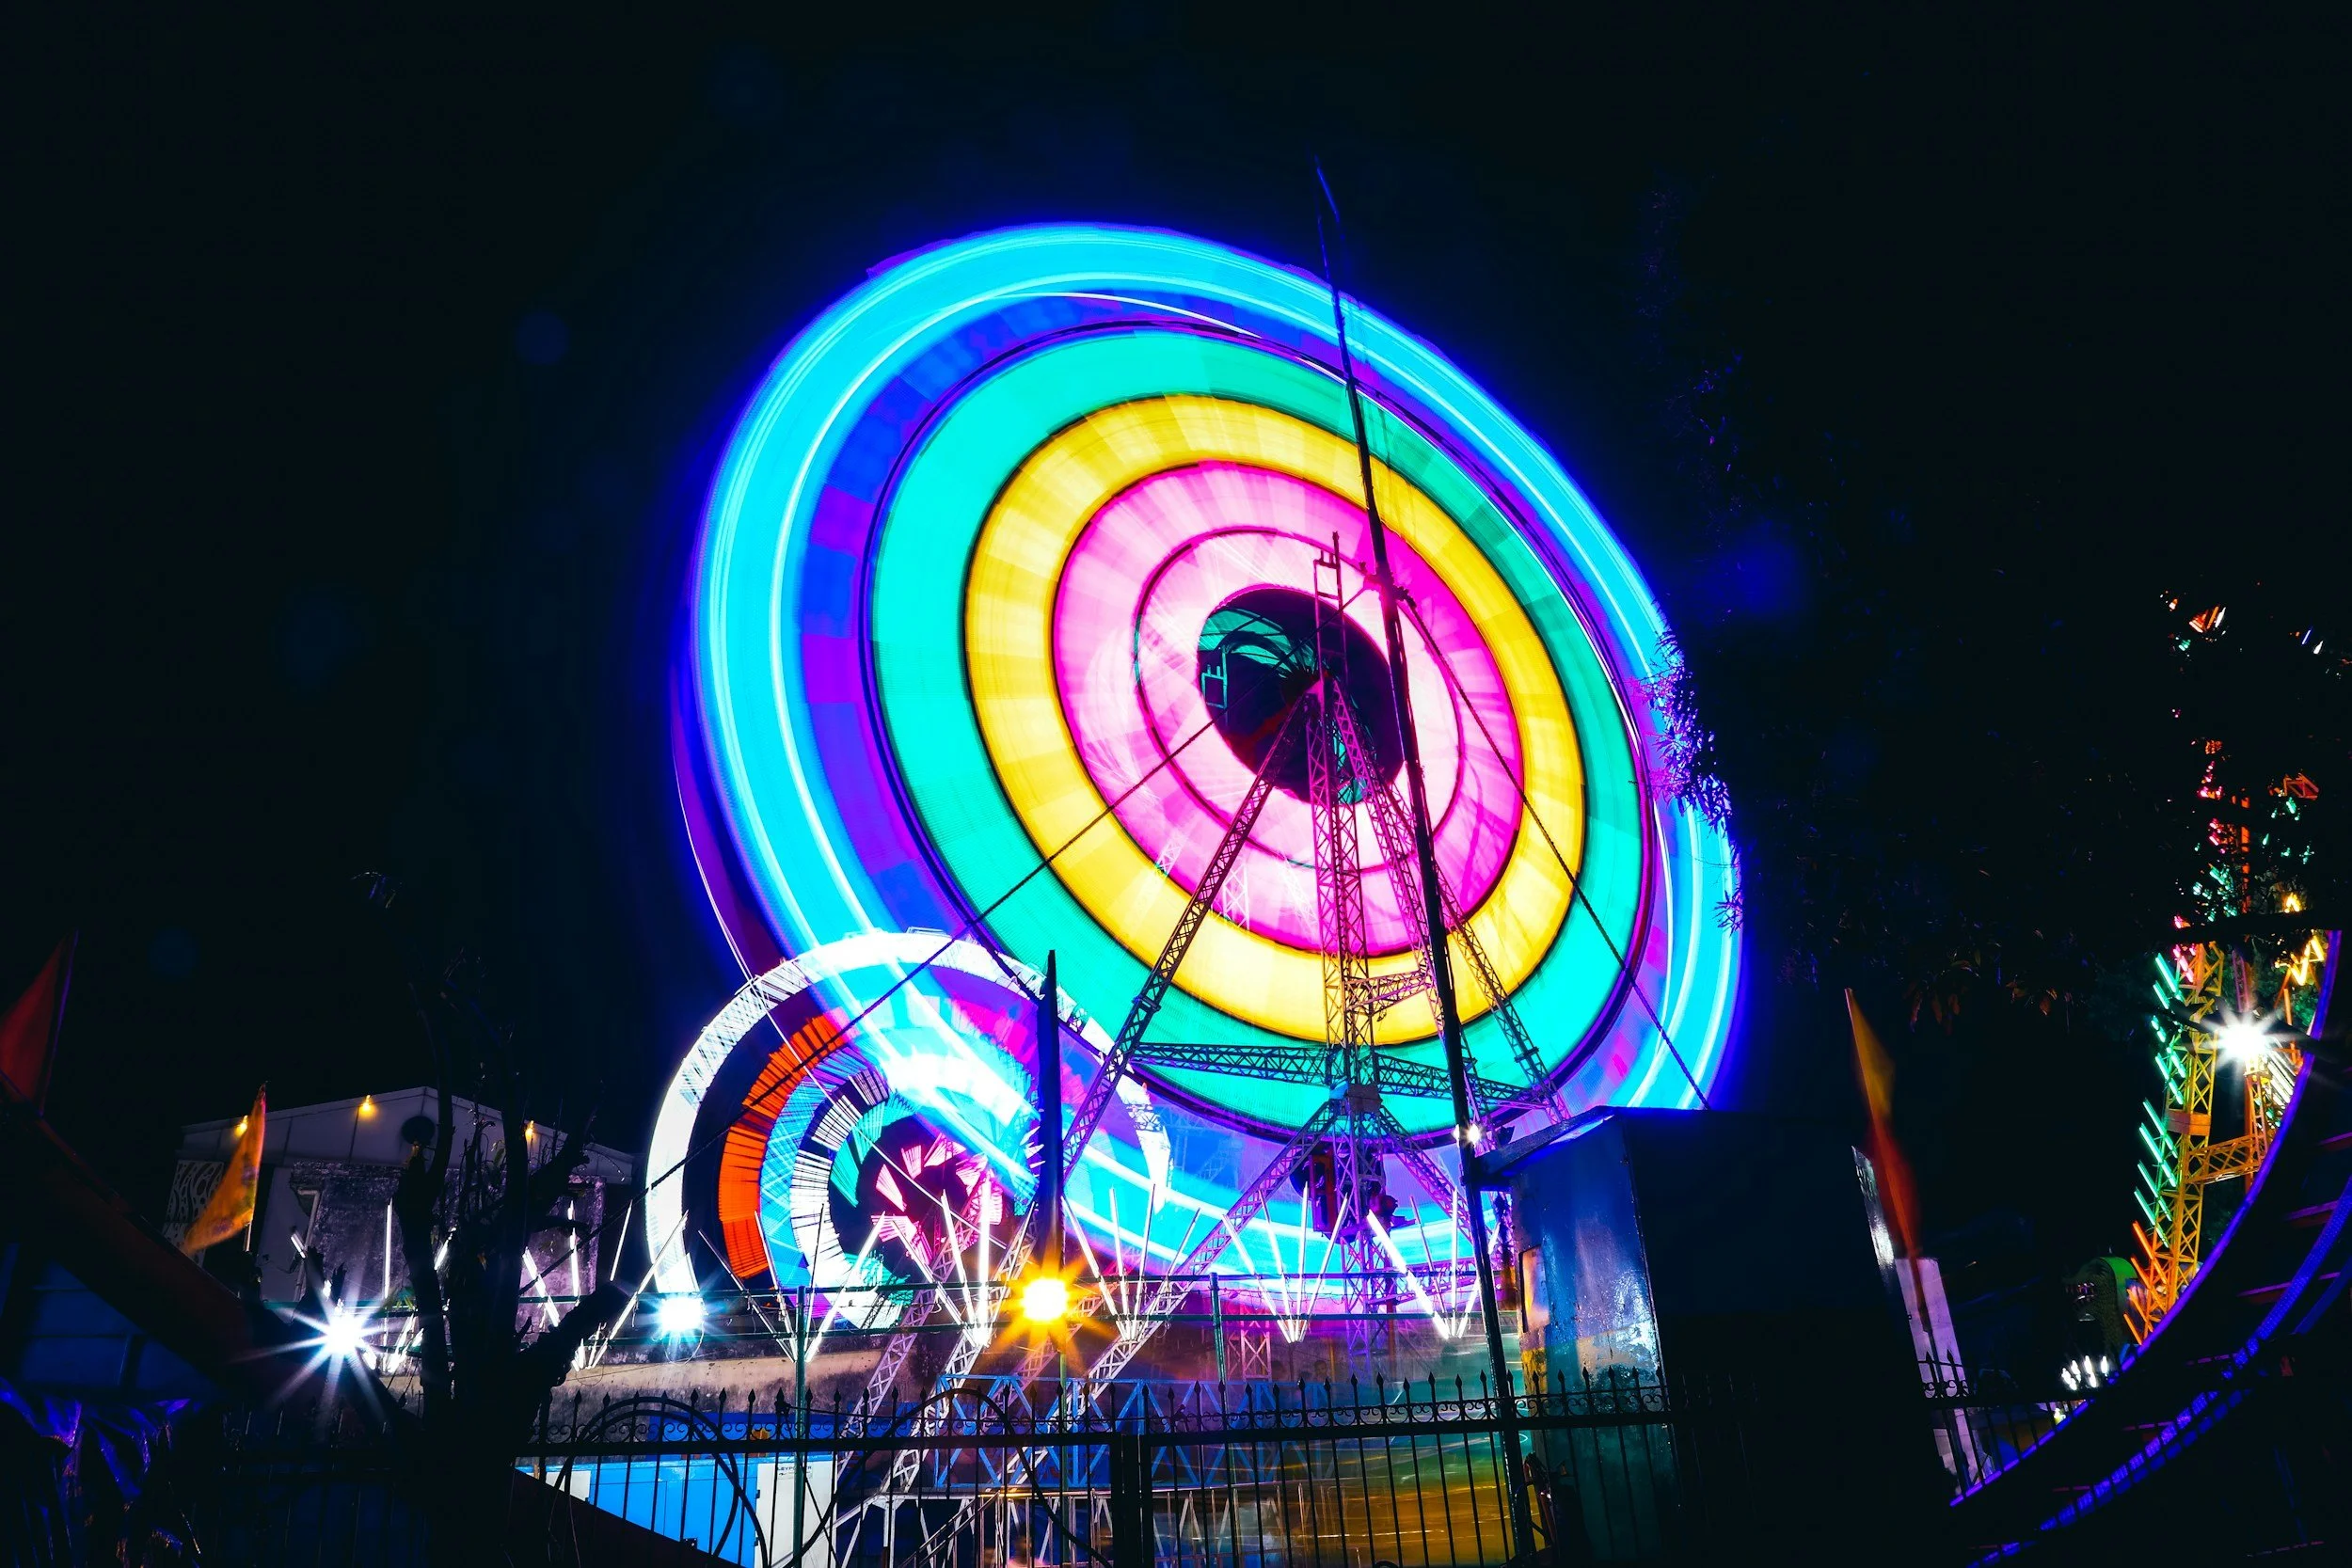
What Can You Achieve with a Slow Shutter?
Employing a slow shutter enables you to effectively 'paint with time', creating dreamlike effects that convey a profound sense of atmosphere and motion. This method excels at simplifying a visually busy scene. For example, the chaotic energy of crashing waves on a coastline can be smoothed into a serene, milky mist, drawing focus to the steadfast rocks. In an urban environment, the headlamps and tail lights of moving vehicles are rendered not as individual cars but as continuous rivers of red and white light. It can also reveal movement that is too slow for the human eye to perceive, such as the gentle drift of clouds across the sky or the majestic trails of stars as the Earth rotates.
The Three Pillars of Long Exposure Success
To achieve distinction in this photographic craft, one must master three core concepts. These pillars provide the essential framework for creating controlled, intentional, and impactful long exposure images. We will explore each in detail throughout this guide.
Stability: The camera must remain perfectly still for the entire exposure. Any movement, however slight, will result in a soft or blurred image, compromising the critical sharpness of your static elements. A sturdy tripod is non-negotiable.
Light Control: With the shutter open for an extended period, the camera’s sensor is highly susceptible to overexposure. You must learn to manage the ambient light, often with the use of neutral density filters, to achieve a correctly balanced photograph.
Time: The shutter speed duration is your primary creative decision. Whether you choose a two-second exposure to capture the texture of moving water or a two-minute exposure to erase it completely, this choice dictates the final aesthetic of your image.
The Essential Toolkit for Long Exposure Photography
To achieve mastery in long exposure photography is to learn how to control time itself. This requires not an expensive collection of equipment, but a foundational toolkit chosen for precision and stability. While a vast array of accessories exists, a few key items are truly indispensable for producing sharp, ethereal images. This equipment provides the stability and control required to implement the precise long exposure camera settings that transform a scene. The essentials can be distilled into three core components: an unwavering support, a hands-free shutter method, and a means to control light.
Choosing Your Tripod: The Foundation of Sharpness
The single most critical investment for this craft is a sturdy tripod; it is entirely non-negotiable. During exposures that last several seconds or minutes, even the slightest vibration will result in a soft, blurred image, undermining the entire effort. Look for a model with a robust construction, a weight rating that comfortably exceeds your camera and lens combination, and a solid, reliable head. A flimsy, budget tripod is a false economy that will only lead to frustration. For added stability in windy conditions, hang your camera bag from the centre column.
Equally important is a method for hands-free camera operation. The simple act of pressing the shutter button can introduce minute vibrations. To eliminate this, use either a remote shutter release (cabled or wireless) or your camera’s built-in two-second self-timer. This small step ensures that the exposure begins with absolute stillness, which is paramount for achieving critical sharpness.
Demystifying Neutral Density (ND) Filters
Think of a Neutral Density (ND) filter as sunglasses for your lens. Its sole purpose is to reduce the amount of light reaching the camera's sensor, allowing you to use a much longer shutter speed than would otherwise be possible, especially during daylight. They are graded by their strength, or the number of 'stops' of light they block:
3-Stop (ND8): Ideal for creating subtle motion blur in low-light conditions, such as smoothing a waterfall in a shaded forest.
6-Stop (ND64): A versatile choice for blurring moving water or capturing moderate cloud movement, effective from dawn until dusk.
10-Stop (ND1000): A specialist filter for creating dramatic, otherworldly effects in bright, midday sun, capable of turning rolling waves into a fine mist.
For those beginning their journey, a high-quality 6-stop or 10-stop filter offers a versatile starting point for exploring the creative potential of daytime long exposure work.
Mastering the Camera Settings for Long Exposure
Achieving mastery in long exposure photography is less about chance and more about a disciplined, repeatable workflow. By following a structured sequence of adjustments, you can consistently produce images of exceptional clarity and impact. This methodical process ensures that technical precision supports your creative vision. We recommend adopting the following four-step approach for every shot.
Step 1: Compose and Focus First. Before affixing any filters, frame your composition and achieve sharp focus using autofocus. Once focus is locked, switch your lens to manual focus (MF) to prevent it from changing during the exposure.
Step 2: Select Your Mode. Switch your camera to Manual (M) mode for complete creative control over all settings. This is the professional standard for predictable results.
Step 3: Set Your Base ISO. To ensure the highest image quality and minimise digital noise, set your ISO to its lowest native value-typically ISO 100 or 200.
Step 4: Determine Shutter Speed. Take a correctly exposed test shot without the filter to establish a 'base' shutter speed. This value becomes the foundation for your final calculation. For a detailed walkthrough, many photographers find a step-by-step long exposure guide to be an invaluable reference.
The Role of Aperture and ISO
Your choice of aperture is critical. A mid-range aperture between f/8 and f/11 is often recommended as it represents the sharpest point for most lenses, ensuring excellent detail across a deep depth of field. Remember that a narrower aperture (a higher f-number) restricts light, thus requiring a longer shutter speed. Your ISO, however, should remain at its base level to produce a clean, professional-quality image free from distracting grain.
Calculating Shutter Speed and Using Bulb Mode
Once your Neutral Density (ND) filter is attached, you must calculate the new shutter speed. This is a matter of multiplication based on the filter's strength. For instance, a 10-stop ND filter requires you to multiply your base exposure time by 1,024 (or 2¹⁰). A base shutter speed of 1/125s, therefore, transforms into a calculated exposure of approximately 8 seconds. For any exposure that needs to exceed your camera’s 30-second limit, you must use Bulb Mode. This setting keeps the shutter open for as long as you depress the shutter release, which is best controlled with a remote to eliminate camera shake.
Four Classic Long Exposure Scenarios & How to Shoot Them
Having established the theoretical principles of long exposure photography, we now transition to its practical application. To refine your technique, it is beneficial to begin with established scenarios that demonstrate the creative potential of this method. Below, we present four classic subjects, complete with recommended settings and professional guidance. Consider these as foundational 'recipes' from which you can experiment and develop your own distinct style.
Scenario 1: Silky Water (Waterfalls & Seascapes)
The objective here is to transform the dynamic movement of water into a smooth, ethereal texture. This effect is particularly striking with waterfalls, rivers, and coastal waves, lending the image a serene and dreamlike quality that elevates a standard landscape photograph.
Primary Goal: To smooth the motion of water into a soft, misty texture.
Essential Gear: Tripod, ND filter (3 to 6-stop), remote shutter release.
Starting Settings: ISO 100, Aperture f/8-f/16, Shutter Speed 1-30 seconds. The required shutter duration depends entirely on the velocity of the water.
Professional Tip: Overcast days are ideal for this type of long exposure. The diffused, soft light reduces harsh contrast and allows for longer shutter speeds without overexposing the highlights.
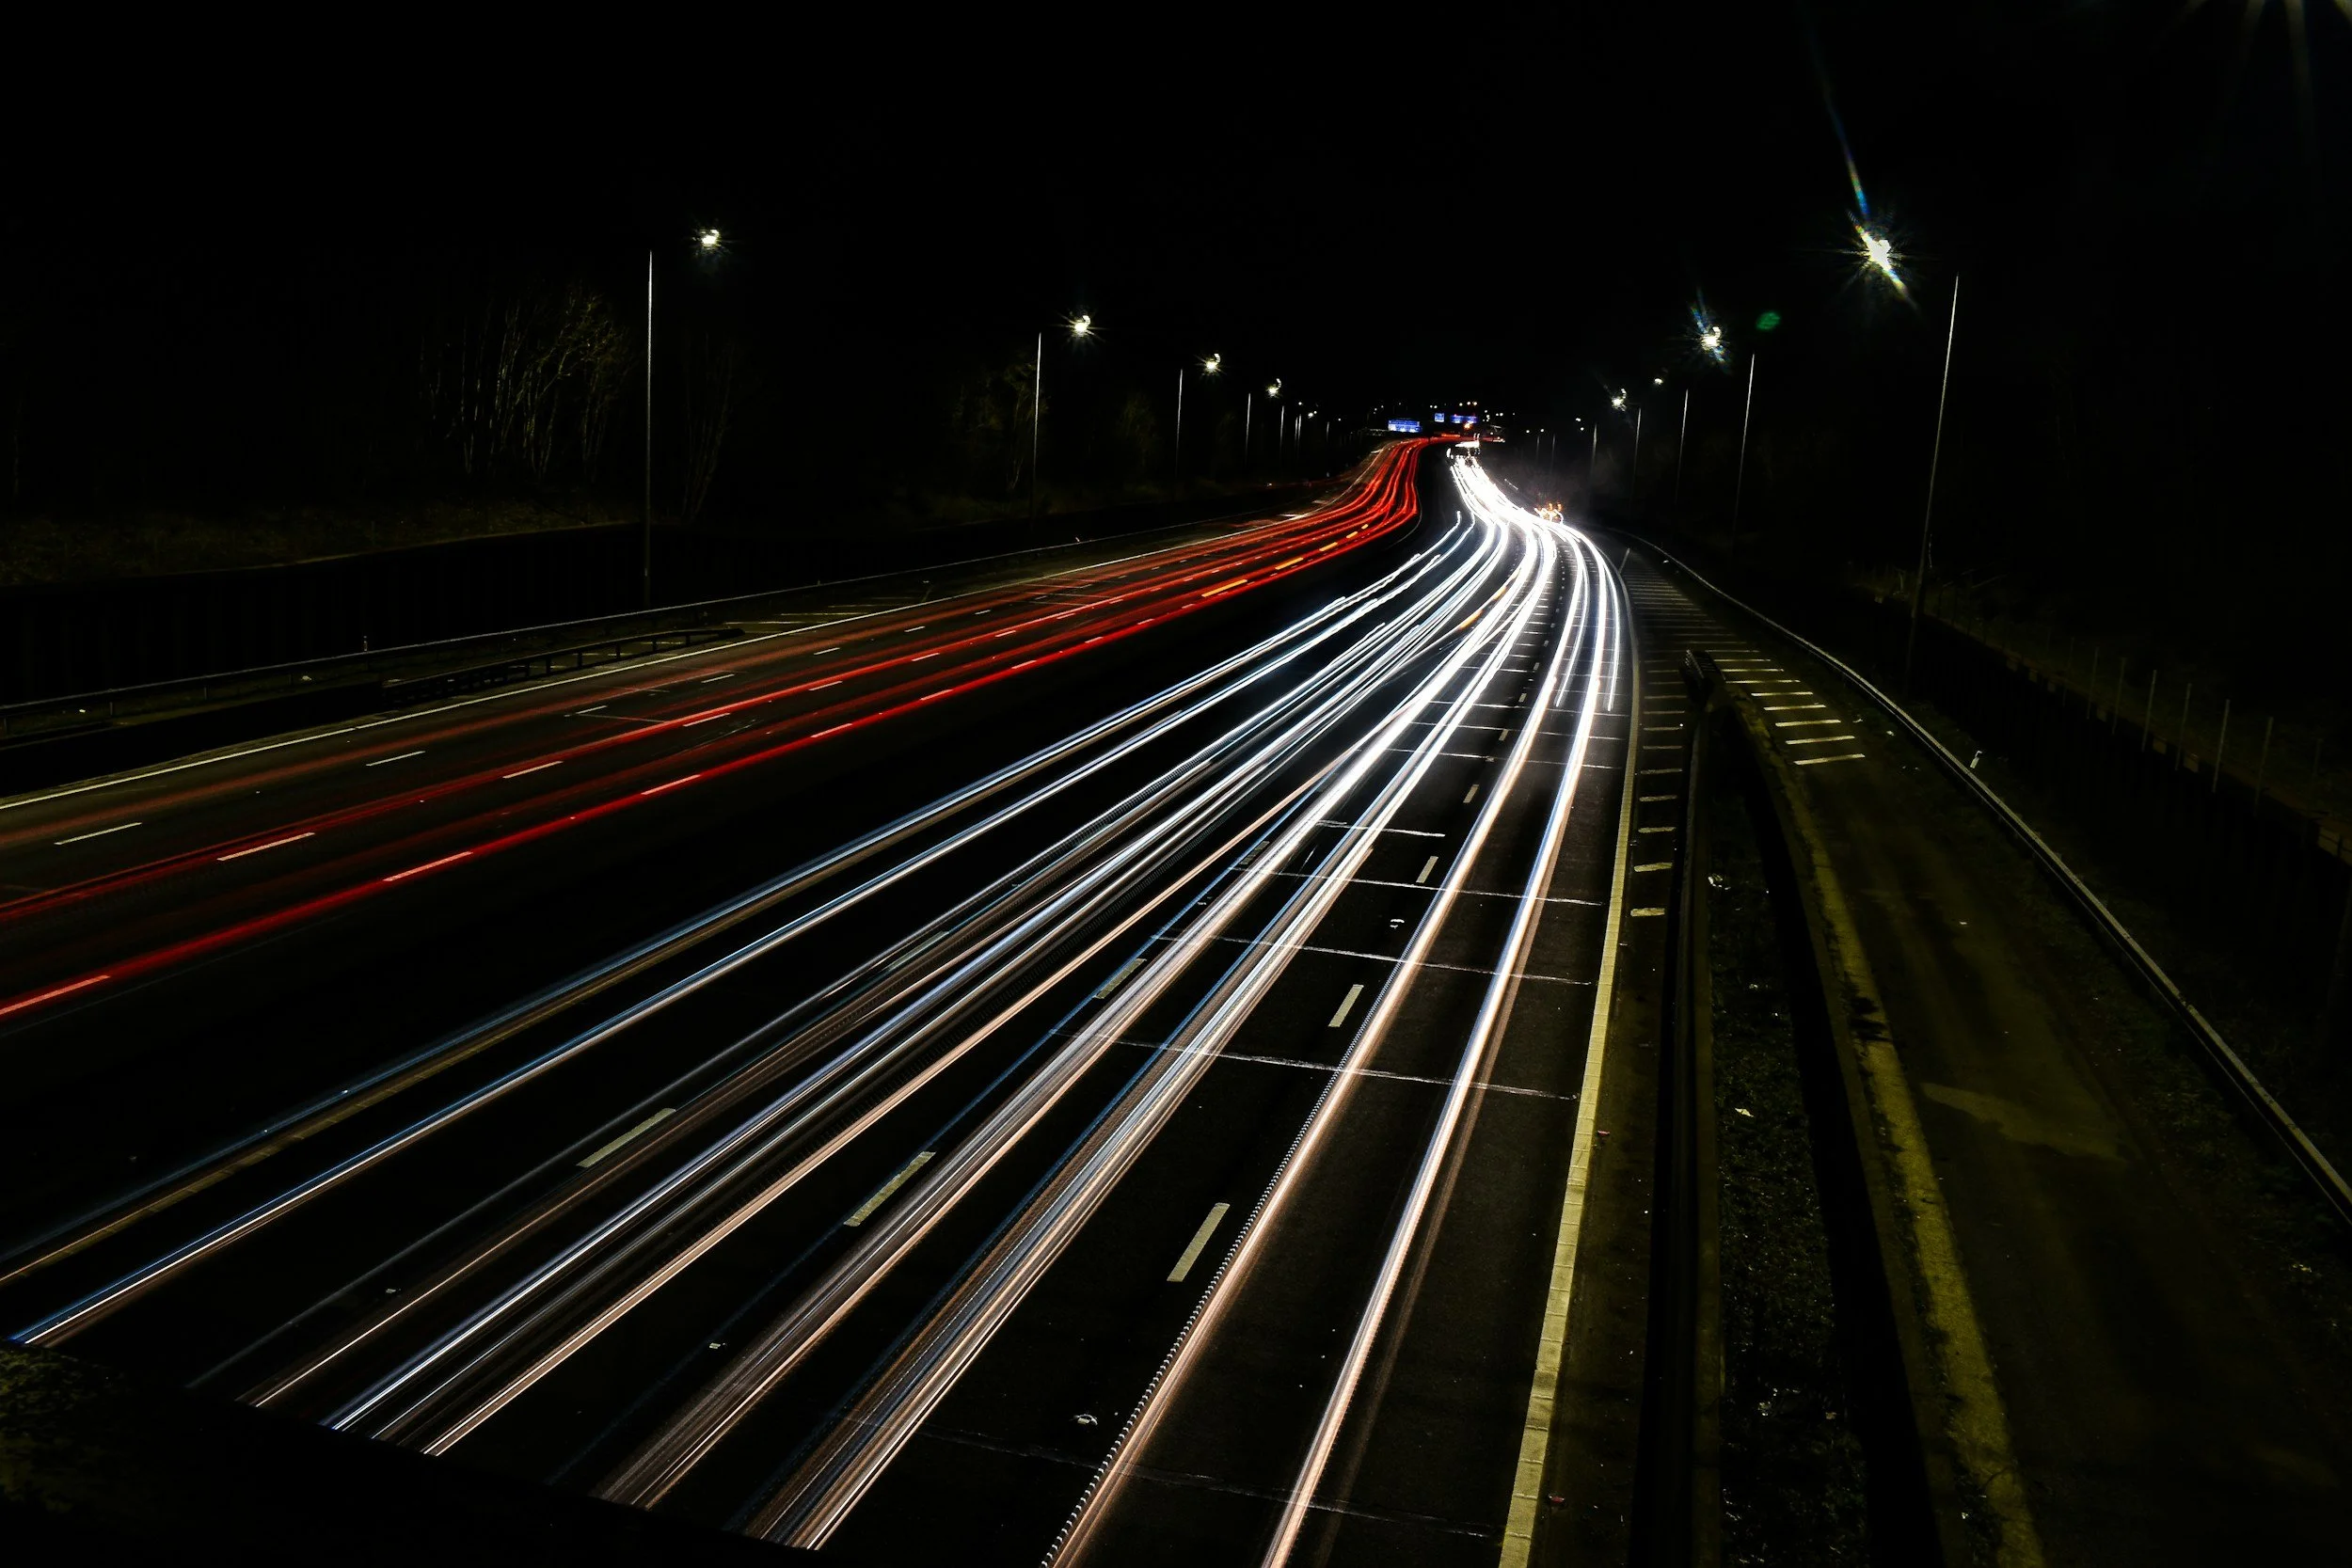
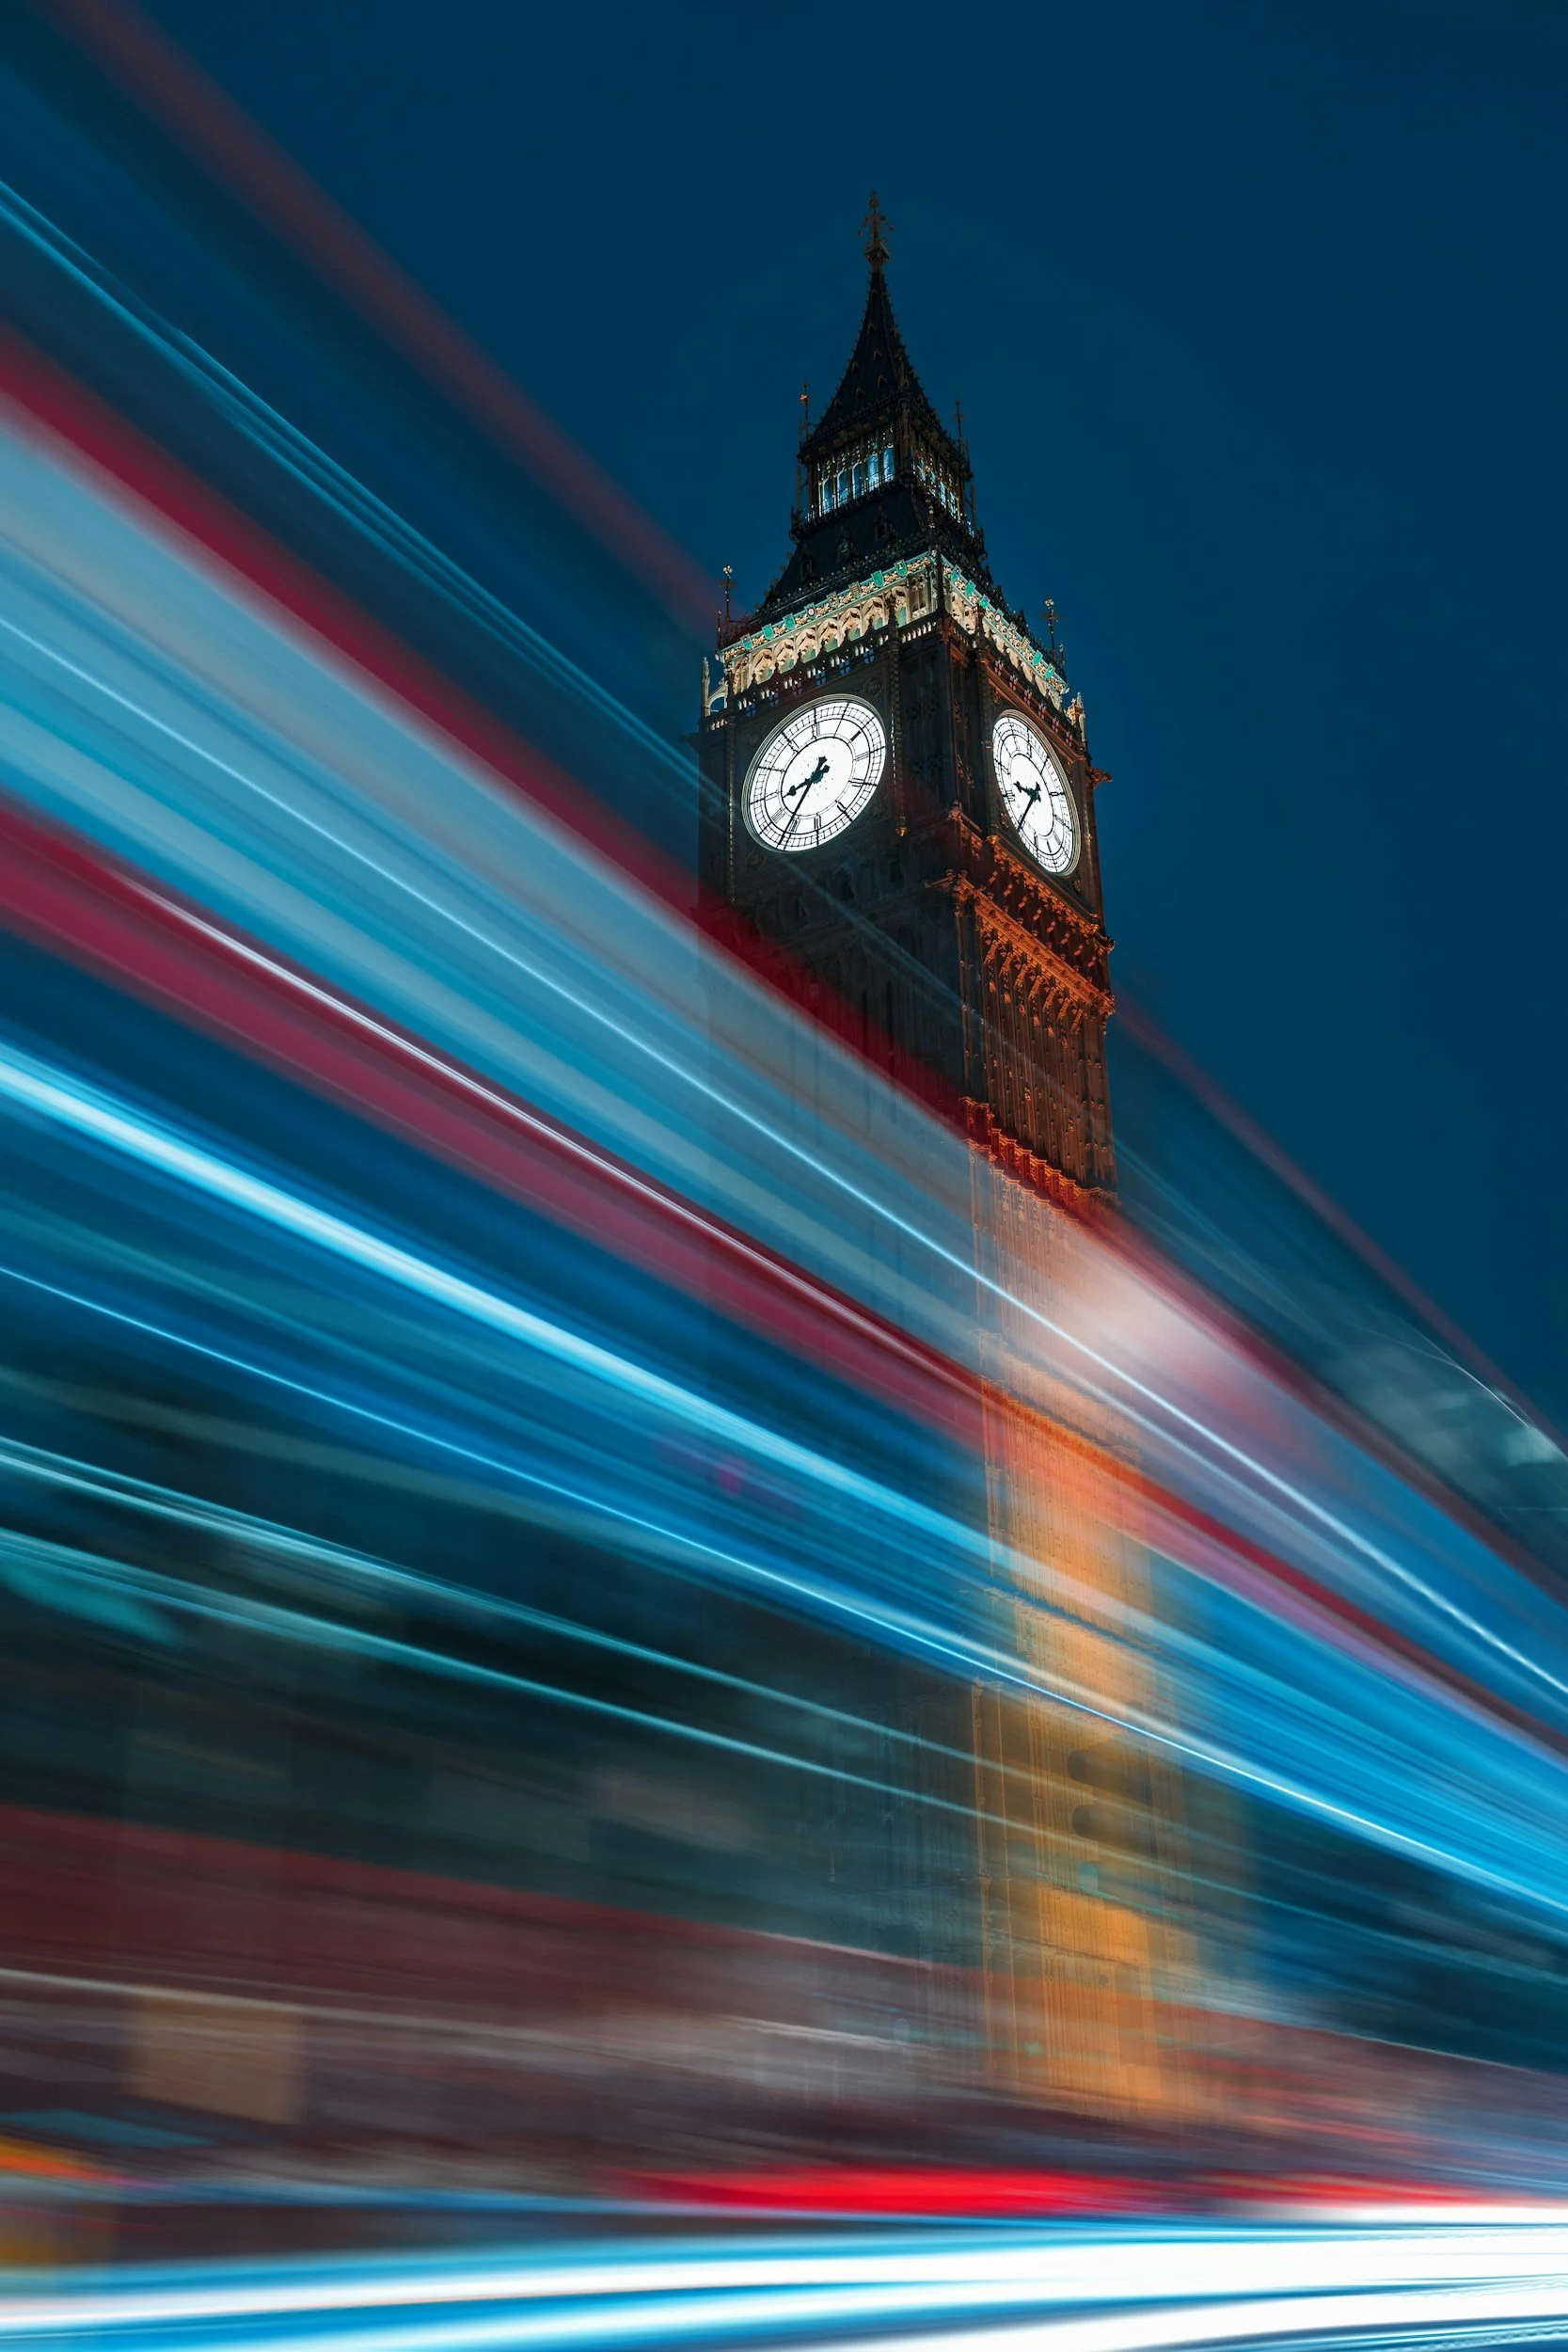
Scenario 2: Urban Light Trails (Traffic at Night)
This technique captures the vibrant energy of a city after dark, turning the headlights and taillights of moving vehicles into continuous streaks of red and white light. It is a powerful way to convey motion and dynamism within an otherwise static urban landscape.
Primary Goal: To capture the streaks of light from moving vehicles.
Essential Gear: Tripod, remote shutter release.
Starting Settings: ISO 100, Aperture f/11-f/18, Shutter Speed 10-30 seconds. A longer shutter will capture more trails for a more dramatic effect.
Professional Tip: For the most compelling results, shoot during the 'blue hour'-the period shortly after sunset when the sky retains a deep, rich blue. This provides a beautiful backdrop that balances perfectly with the artificial city lights.
Scenario 3: Ethereal Clouds (Daytime Skies)
By extending the exposure time during the day, it is possible to record the movement of clouds across the sky. This transforms them from distinct shapes into soft, painterly streaks, adding a profound sense of drama and the passage of time to landscape compositions.
Primary Goal: To show the movement of clouds as soft streaks across the sky.
Essential Gear: Sturdy tripod, a strong ND filter (10-stop or higher is essential), remote shutter release.
Starting Settings: ISO 100, Aperture f/8-f/11, Shutter Speed 30 seconds to 2+ minutes.
Professional Tip: This technique is most effective on days with defined, fast-moving clouds and some blue sky visible. A completely overcast sky will simply render as a flat white, lacking the desired texture.
Scenario 4: Celestial Motion (Star Trails)
One of the most rewarding disciplines involves capturing the Earth's rotation relative to the stars. This produces captivating images where stars appear as circular trails of light, a testament to the grand scale of the cosmos and a mastery of the camera.
Primary Goal: To capture the apparent movement of stars as concentric arcs of light.
Essential Gear: Tripod, remote shutter with a lock, a wide-angle lens with a fast aperture (e.g., f/2.8).
Starting Settings: ISO 400-800, Aperture f/2.8-f/4, Shutter Speed 30 seconds (for image stacking) or 15+ minutes in Bulb mode.
Professional Tip: For classic circular trails, locate Polaris (the North Star) and centre it in your composition. Shooting on a clear, moonless night far from urban light pollution is critical for achieving clean, well-defined trails.
From Technique to Artistry: Refining Your Craft
Mastering the technical settings for long exposure photography is a significant achievement, yet it is merely the foundation upon which true artistry is built. To elevate your work from a competent record to a compelling image, you must turn your attention to composition. Consider how the fluid motion you capture interacts with static elements in your frame. Use leading lines-a pier stretching into a misty sea or a winding road under a star-strewn sky-to guide the viewer's eye. The contrast between a sharp, unmoving subject and the soft blur of motion is where the narrative power of this technique truly lies.
As you advance, you will encounter more sophisticated methods. For astrophotography, a technique known as 'image stacking' allows you to combine multiple shorter exposures. This process significantly reduces digital noise, resulting in a cleaner and more detailed final image than a single, extremely long shot could achieve. Simultaneously, you must remain vigilant against common errors such as subtle camera shake or light leaks from the viewfinder, which can compromise an otherwise perfect capture.
Common Problems and Professional Solutions
Even experienced photographers encounter challenges. Anticipating and resolving them is a mark of professionalism. Here are solutions to frequent issues:
Blurry Images: The primary cause is instability. Invest in a robust, heavy-duty tripod and use a remote shutter release or your camera’s self-timer to eliminate any physical contact during the exposure.
Overexposed Photos: If your scene is too bright even at a low ISO and small aperture, you require a stronger Neutral Density (ND) filter to reduce the amount of light entering the lens, permitting a longer shutter speed.
Digital Noise: For single captures, ensure your ISO is set to its base level (typically 100). Activating your camera’s built-in Long Exposure Noise Reduction (LENR) can also be effective, though it will double the processing time for each shot.
Your Next Step in Photographic Mastery
Developing an intuitive feel for how shutter speed will render a scene comes only with dedicated practice. While experimentation is essential, the path to distinction can be accelerated significantly through structured learning and expert critique. Understanding not just the 'how' but the 'why' behind each decision is what separates the enthusiast from the professional.
The Institute provides an environment where these advanced concepts are explored in depth, with direct guidance from seasoned tutors. Our programmes are designed to refine your skills, develop your creative vision, and give you a distinct professional edge. If you are ready to transform your technical ability into artistic expression, we invite you to take the next step. Elevate your photography with our tutor-led workshops.
From Technique to Artistry: Your Journey Forward
You have now explored the foundational principles of long exposure, understanding it not merely as a technique, but as a way to interpret and capture the passage of time. From assembling the essential toolkit to mastering the precise camera settings for waterfalls, cityscapes, and skies, you have the knowledge to begin creating truly dynamic images. This guide marks the start of your journey; the transition from competence to artistry, however, is refined through dedicated practice and expert guidance.
If you are ready to elevate your skills and develop a compelling body of work, the Institute of Photographers offers the structured support you need. Our accredited and recognised training programmes provide tutor-led, practical workshops and invaluable portfolio-building opportunities, all designed to give your creative passion a distinct professional edge. Take the next step in your creative journey. Explore our photography courses.
Your vision deserves to be realised with distinction. We look forward to guiding you.
Frequently Asked Questions About Long Exposure
Do I absolutely need an ND filter for long exposure?
Not in all circumstances. For night photography, the low ambient light often allows for extended shutter speeds without one. However, for creating motion blur in daylight-such as with waterfalls or clouds-a Neutral Density (ND) filter is essential. It acts like sunglasses for your lens, reducing light and enabling the correct exposure over a longer duration. Without it, your daytime images would be severely overexposed, losing all highlight detail.
What is 'Bulb Mode' on my camera and when should I use it?
'Bulb Mode' is a camera setting that keeps the shutter open for as long as you depress the shutter release button. It is designed for exposures exceeding your camera’s typical 30-second limit. To avoid camera shake and ensure sharpness, it is almost always used with a remote shutter release or an intervalometer. This mode grants you complete creative control over the timing for exceptionally long exposures, such as for star trails or light painting.
How do I focus my camera in the dark for a night-time long exposure?
Autofocus systems struggle in low light, so switching to manual focus is the professional standard. Use your camera’s live view and digitally zoom in on the brightest distant point you can find, such as the moon or a streetlamp. Carefully adjust the focus ring until this point is pin-sharp. Once set, take care not to move the focus ring again. This technique ensures your landscape or cityscape remains perfectly sharp throughout the exposure.
Can I do long exposure photography with my smartphone?
Yes, capturing a long exposure with a smartphone is increasingly feasible. Many modern phones feature a dedicated 'Night Mode' or 'Long Exposure' setting that computationally mimics the effect. For greater control, third-party applications can offer manual settings. Regardless of the method, a small tripod is non-negotiable to ensure the phone remains perfectly still and your resulting image is sharp, preventing any unwanted motion blur from hand-holding the device.
What's the difference between a cheap and an expensive ND filter?
The primary difference lies in optical quality and colour neutrality. Inexpensive filters, often made from resin, can introduce a noticeable colour cast-typically magenta or blue-and reduce image sharpness. Premium filters, crafted from high-quality optical glass with advanced coatings, maintain colour accuracy and preserve fine detail. While a basic filter under £30 is a good starting point, investing in a professional-grade filter ensures your final image quality is not compromised.
How long is 'too long' for an exposure?
There is no definitive rule; the ideal exposure time is dictated by your creative vision and the ambient light. An exposure is 'too long' when it results in irretrievably blown-out highlights, where all detail is lost to pure white. It can also be too long if the motion blur becomes excessive for your intended subject, for instance, rendering a flowing river as an indistinct, textureless fog. The correct duration is one that properly balances light and motion.
Why are my long exposure photos coming out completely white?
A completely white photograph indicates severe overexposure, meaning the camera's sensor was exposed to far too much light. To correct this, you must reduce the amount of light reaching the sensor. You can achieve this by selecting a smaller aperture (a higher f-number like f/11 or f/16), lowering your ISO to its base value (e.g., 100), or using a stronger Neutral Density (ND) filter to block more of the incoming light.
Does long exposure photography damage the camera's sensor?
Under normal conditions, long exposure photography poses no risk to your camera's sensor. Sensors are designed to handle being active for extended periods, and any minor heat generated is well within operational tolerances. The only potential for damage-which applies to all photography-is from pointing the lens directly at the sun for a prolonged time without an appropriate solar filter. For typical creative applications, you can proceed with complete confidence that your equipment is safe.