
Mastering Rembrandt Lighting: A Professional Guide to Dramatic Portraiture (2026)
The most powerful tool in your lighting kit isn't your flash; it's the shadow it creates.
It's a common frustration for many developing photographers. You invest in high-quality equipment, yet your portraits feel flat, lacking the depth and emotion you see in the work of established professionals. The subtle art of controlling shadow can feel elusive, often resulting in images that don't quite capture the story you intended to tell. This is where mastering the principles of lighting Rembrandt becomes transformative.
In this definitive 2026 guide, we will demystify this prestigious technique, providing you with a structured, step-by-step approach to creating portraits with profound depth and character. You will learn not just how to place your light, but why each adjustment matters, empowering you to develop a signature style that commands attention and elevates your professional portfolio. We will explore the precise geometry of the light source, the tools required for consistent results, and post-production techniques to refine your dramatic portraiture.
Key Takeaways
Discover the fundamental 45/45 rule for positioning your key light, a technique adaptable for both professional strobes and simple window light.
Master the defining characteristic of lighting rembrandt: creating the precise triangle of light on your subject’s cheek for a classic, dramatic effect.
Learn how to adapt this studio principle to dynamic wedding venues, elevating your portfolio with powerful ‘Hero Shots’ of the bride or groom.
Explore how to refine your portraits by selecting appropriate light modifiers and understanding the impact of light distance on the quality of your shadows.
What is Rembrandt Lighting? The Anatomy of a Classic Portrait
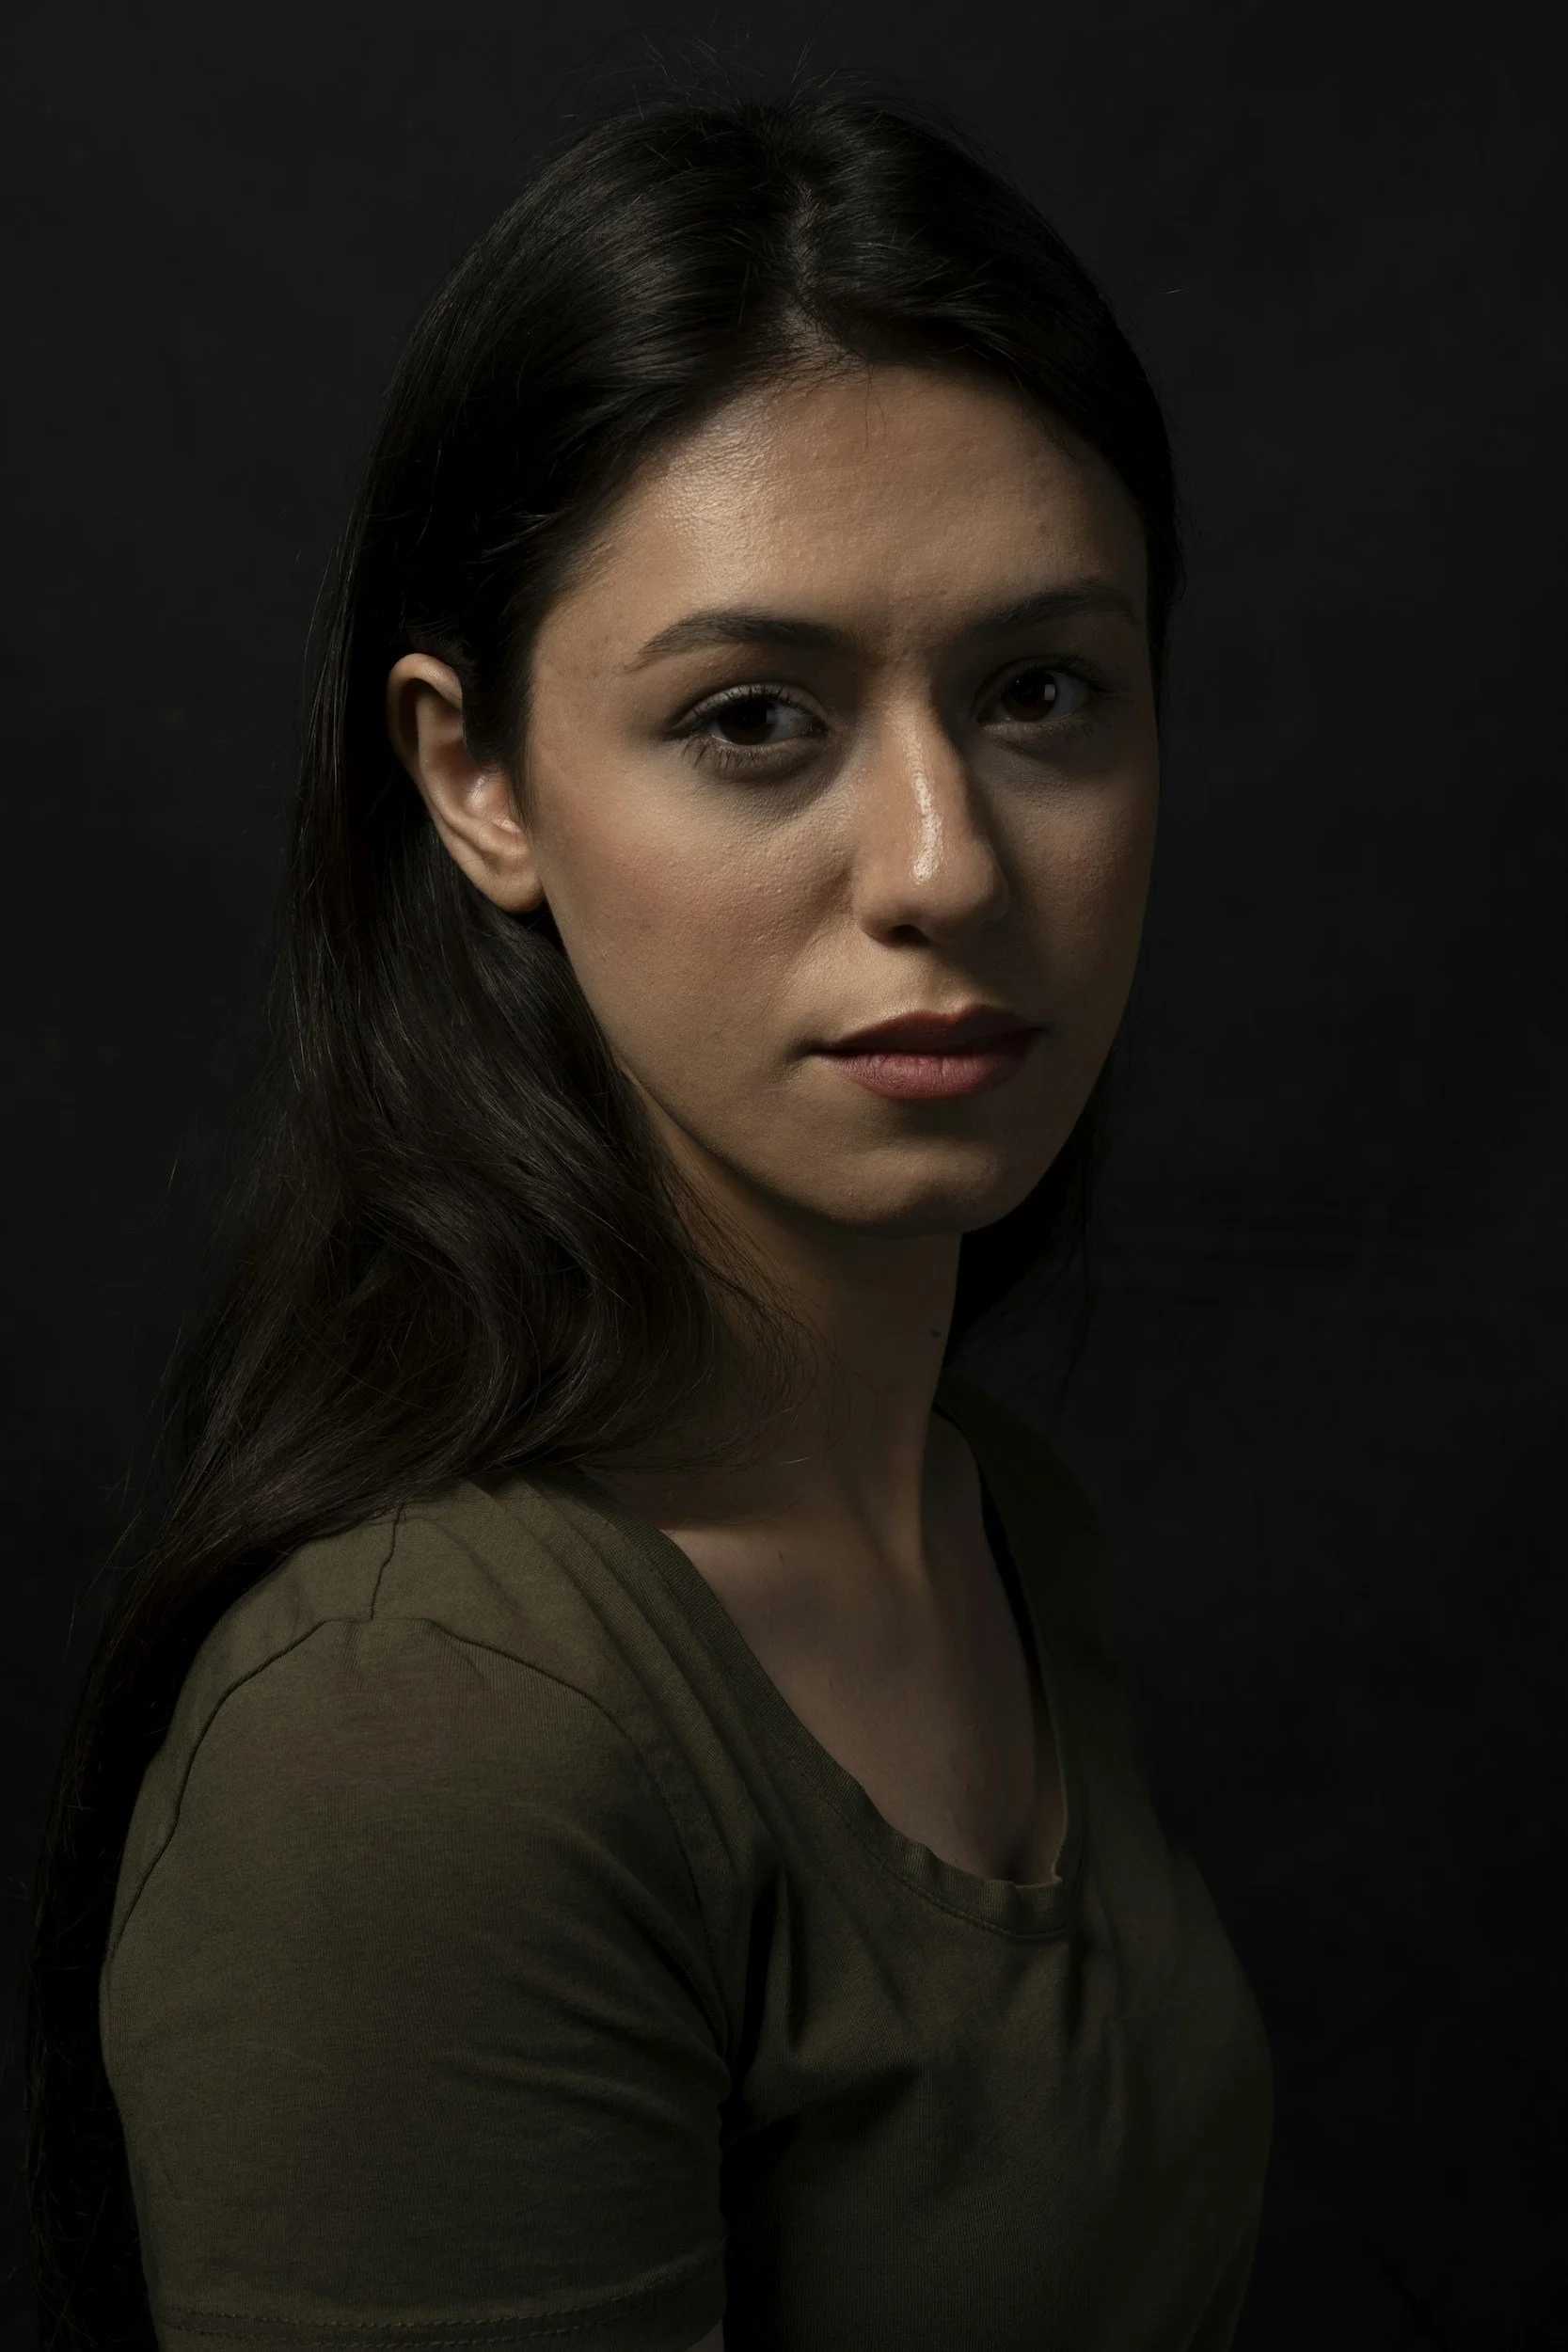
In the pursuit of photographic mastery, certain techniques stand as foundational pillars, their principles transcending time and technology. Rembrandt lighting is one such pillar. Named after the Dutch Master painter Rembrandt van Rijn, this classic portrait style is defined by a specific and evocative pattern of light and shadow. Its signature is a small, inverted triangle of light on the subject's cheek that is on the less-illuminated side of the face. This isn't merely a lighting accident; it's a deliberate and controlled method for introducing depth, mood, and a profound sense of character into an image.
The technique is rooted in the 17th-century painting style of chiaroscuro, which emphasises a stark contrast between light and dark. Rembrandt masterfully used this to guide the viewer’s eye and to model his subjects with a three-dimensional quality that felt both dramatic and intensely personal. For photographers, replicating this effect requires precision. The defining triangle of light has clear parameters for its correct execution:
It must be created by the subject's own nose casting a shadow on their face.
The triangle of light should be no wider than the subject's eye.
Its length should not extend below the subject's nose.
Adherence to these rules distinguishes true Rembrandt lighting from other similar styles, like loop or split lighting. For a deeper historical and technical overview, a useful resource is the Wikipedia entry on What is Rembrandt Lighting? This specific interplay of shadow creates a psychological impact, enveloping the subject in an aura of mystery and prestige. The shadowed portions of the face conceal just enough to provoke curiosity, while the illuminated triangle draws you directly to the human element of the portrait.
The Signature Rembrandt Triangle
The defining triangle is more than just a shape; it's the heart of the portrait's emotional tone. To be truly effective, the eye on the shadowed side of the face must contain a catchlight, a small specular highlight from the main light source. This single spark of light brings life and engagement to the subject's gaze, preventing the shadowed eye from appearing flat or lifeless. This pattern can be achieved through two primary approaches: 'Short' lighting illuminates the side of the face turned away from the camera, creating a slimming and sculpting effect. Conversely, 'Broad' lighting illuminates the side of the face turned toward the camera, which can produce a fuller look.
Why Professional Photographers Still Use It in 2026
Centuries after its conception, the principles of lighting rembrandt portraits remain essential in the modern photographer's toolkit. Its continued prevalence in high-end editorial and wedding portfolios is no accident. This technique is remarkably efficient, capable of producing profoundly dramatic results with just a single light source and perhaps a reflector. This makes it invaluable for location shoots or for photographers seeking to achieve a premium aesthetic without complex setups. It excels at sculpting facial features, enhancing cheekbones and jawlines while adding a tangible sense of three-dimensional depth that elevates a simple photograph into a distinguished portrait.
How to Setup Rembrandt Lighting: A Technical Masterclass
Achieving the classic Rembrandt lighting style is a matter of precision, not complexity. It hinges on a foundational principle known as the 45/45 rule, which serves as an excellent starting point for any portrait session. This rule dictates that your primary light source, or key light, should be positioned approximately 45 degrees to the side of your subject and angled down at 45 degrees from above. This specific placement is what begins to carve out the signature shadows and highlights that define this historic technique.
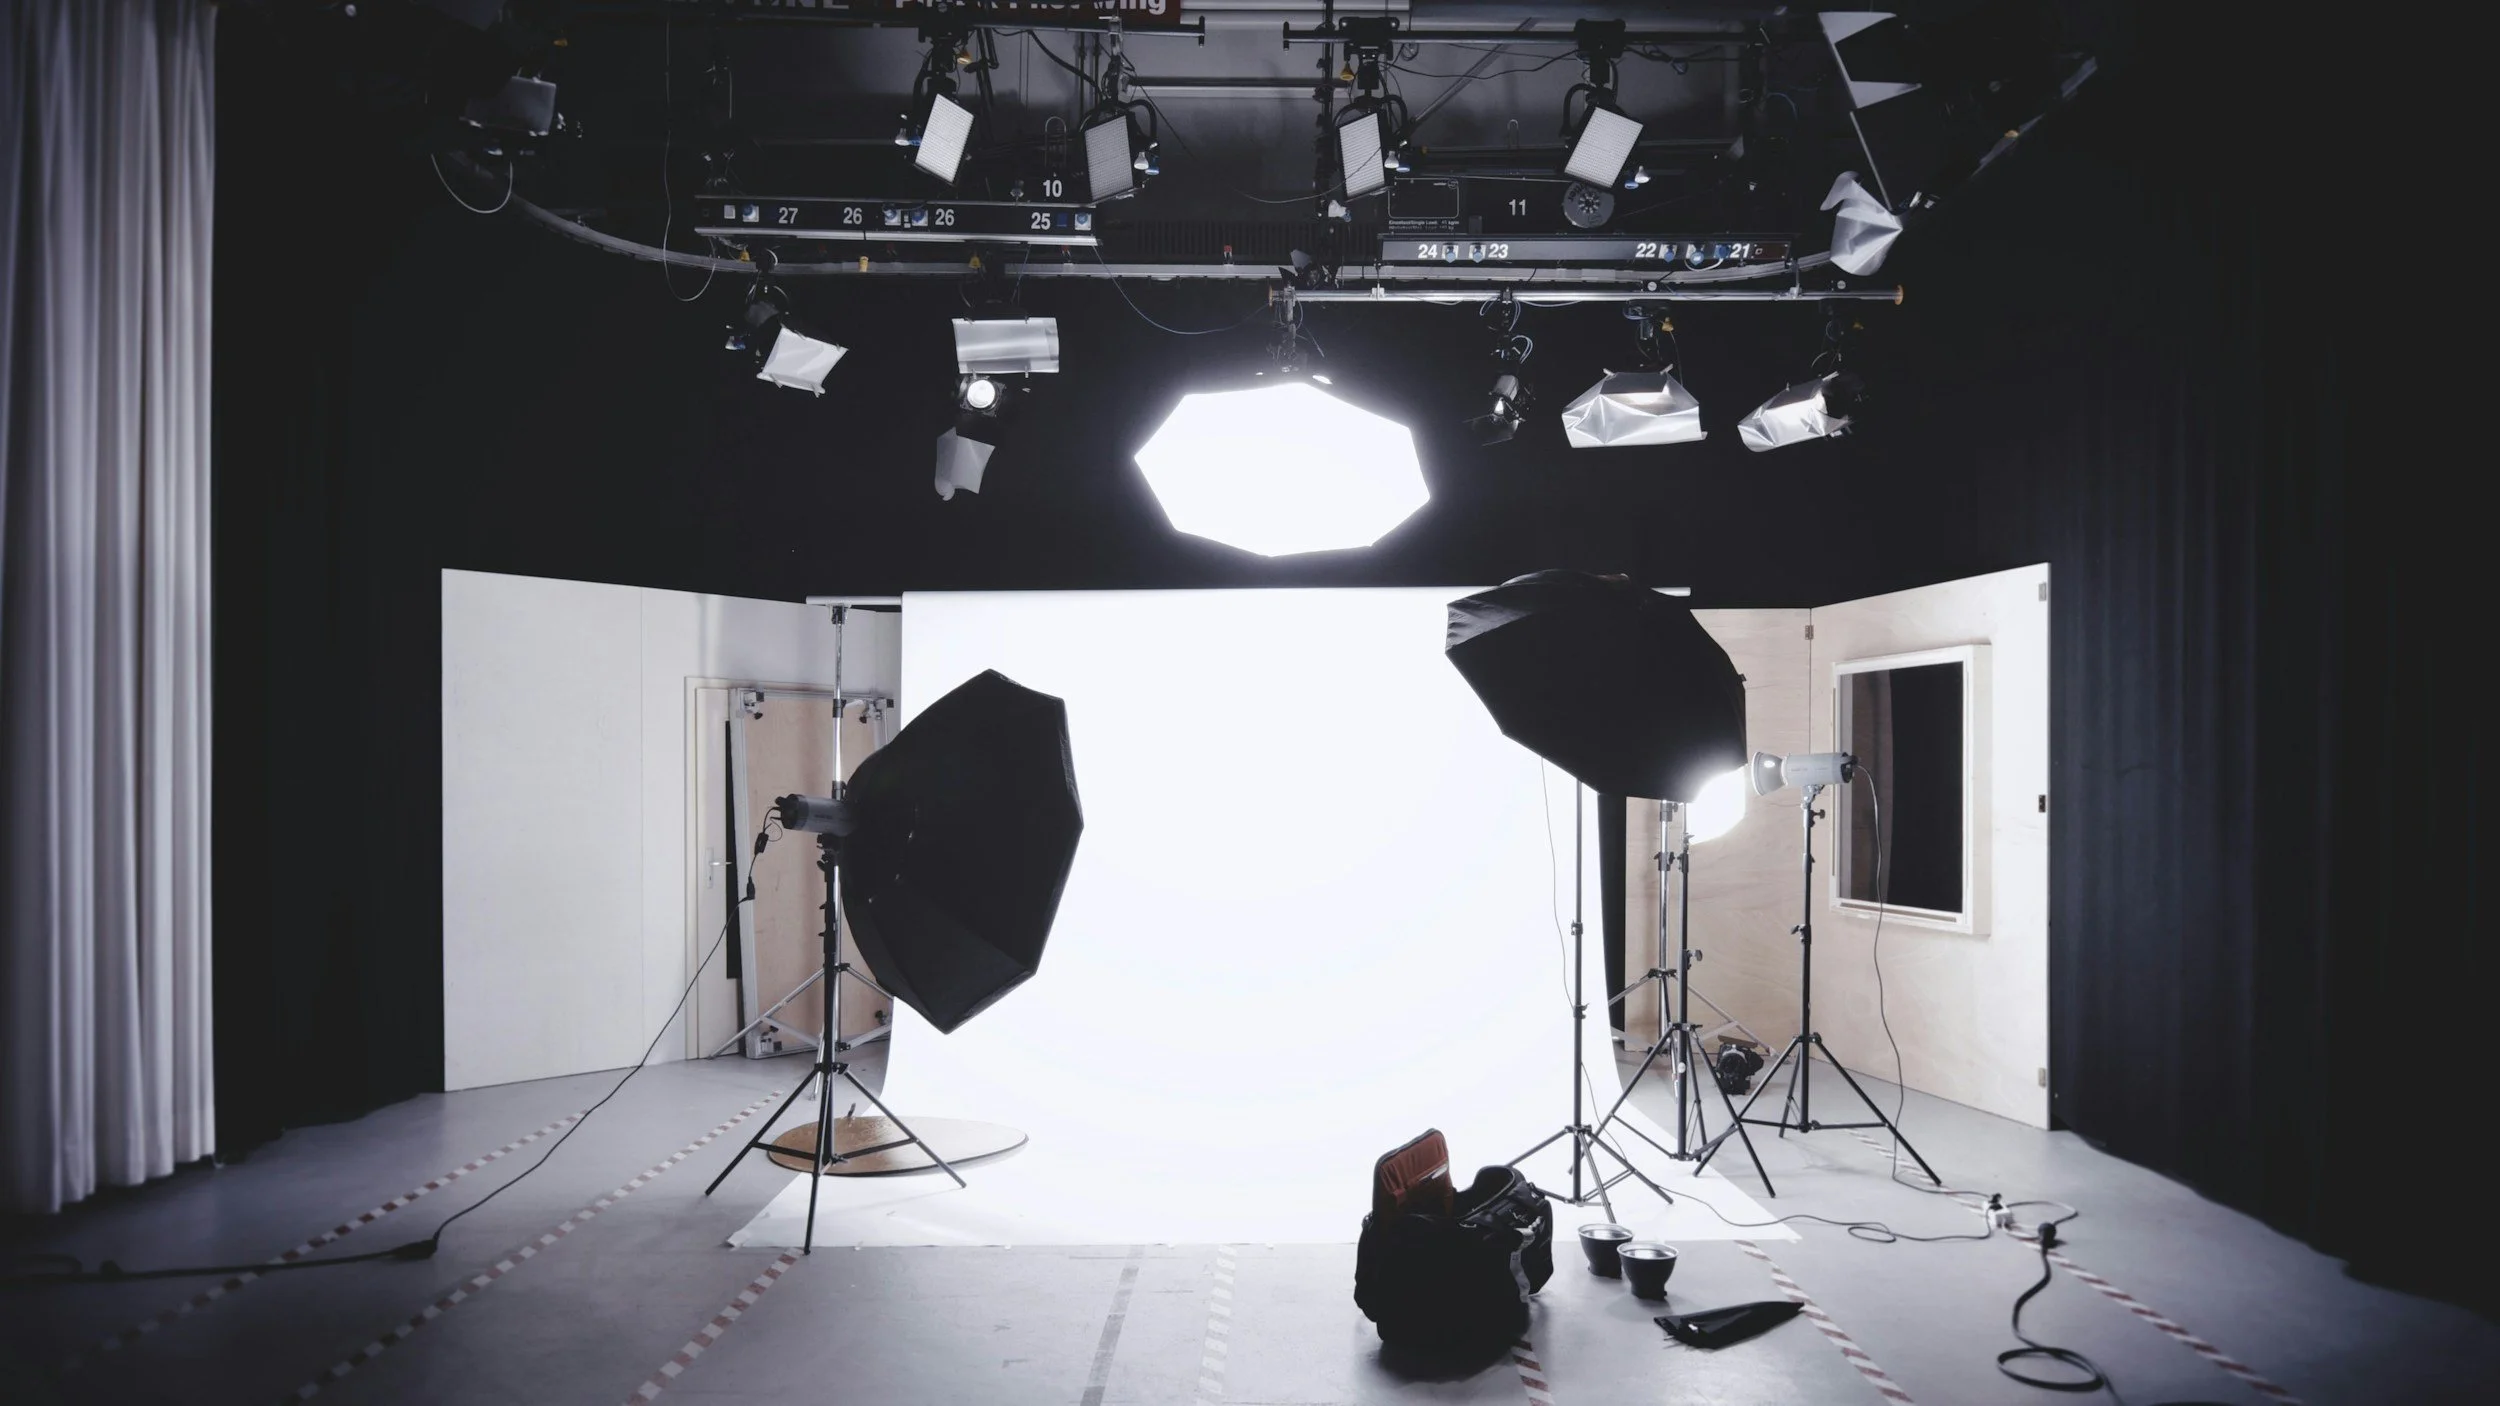
Your choice of equipment can range from the highly professional to the remarkably simple. A studio setup might employ a monolight strobe, such as a Godox AD400 Pro (costing around £600), modified with a softbox to diffuse the light. However, the same principles apply if you are using a single, off-camera speedlight or even the natural light from a window. The tool is secondary to the technique; what matters most is your ability to control the light's direction and quality to shape your subject's features.
Step-by-Step Light Placement
Begin with only your key light turned on. Position your subject and then move the light into the approximate 45/45 position. Your primary objective is to observe the shadows. Watch for the shadow cast by the nose to extend downwards until it just touches the shadow on the cheek. This merging of shadows is what creates the iconic triangle of light on the cheekbone. If the light is too high, the shadow will be too long; too low, and you won't achieve the necessary separation. The goal is a distinct triangle that still allows for a catchlight in the subject's eye, which brings the portrait to life.
Refining this angle is a delicate process. Small adjustments of even 5-10 degrees can shift the entire pattern, transforming your setup from true Rembrandt into Split lighting, where half the face is in shadow. For a visual walkthrough, many professional guides on How to Setup Rembrandt Lighting offer excellent demonstrations of this crucial step. Patience here is paramount to achieving a polished result.
Measuring the Light Ratio
The lighting ratio is the relationship between the intensity of the key light and the fill light. For a classic, dramatic lighting rembrandt effect, a ratio of 4:1 is often ideal. This means the illuminated side of the face is four times brighter (or two stops brighter in photographic terms) than the shadow side. For a softer, more contemporary feel with greater detail in the shadows, a 2:1 ratio is more appropriate. A professional would use a handheld light meter to measure the output on both sides of the face for absolute accuracy. However, you can achieve excellent results by using your camera’s histogram to ensure your highlights are not clipped and your shadows retain the desired level of detail.
Once your key light is set, you can introduce a fill light to manage the contrast. Placed on the opposite side of the camera from the key light, its purpose isn't to eliminate shadows but to gently lift them, controlling their depth. You can use a second, low-powered light or, more simply, a white reflector to bounce some of the key light back into the shadowed areas. The distance and size of the reflector will determine how much you reduce the contrast.
Finally, to prevent your subject from merging with a dark background, a 'kicker' or hair light can be introduced. Positioned behind the subject and to one side, this light source creates a subtle, bright edge along the cheek, jawline, or hair. This final touch provides clean separation and adds a three-dimensional, professional quality to your portrait. While these technical principles provide a robust framework, true mastery comes from practice and expert critique. Refining your control over light ratios is a central component of our professional portraiture courses.
Rembrandt Lighting in Wedding Photography: Elevating the Portfolio
While the controlled environment of a studio provides an ideal learning ground, the true test of a photographer’s skill lies in applying these principles within the dynamic and often unpredictable setting of a wedding day. Translating classic portraiture techniques to a live event transforms your service from simple documentation into the creation of fine art. Mastery of dramatic lighting is what elevates a good portfolio to an exceptional one, providing clients with breathtaking images that become signature pieces of their collection.
In distinguished UK venues, such as the historic Sandon Hall with its grand windows and ornate interiors, opportunities for painterly portraits abound. This is where you create 'The Hero Shot'. Imagine a groom, moments before the ceremony, positioned by a tall window. By carefully controlling the angle of light, you can craft a powerful, masculine portrait defined by shadow and light. Similarly, a bridal portrait using this technique can evoke a sense of timeless elegance, isolating the subject from the background and focusing entirely on form and emotion.
The most accessible method on location is the 'Window Rembrandt'. This involves using a single, large window as your key light source, mimicking the soft, directional light of a north-facing artist’s studio. By positioning your subject at approximately a 45-degree angle to the window, you can achieve the characteristic triangular patch of light on the shadow side of the face. For those seeking a foundational overview, reviewing the principles of What is Rembrandt Lighting?provides excellent context. For evening receptions or dramatic couple sessions after sunset, off-camera flash (OCF) becomes essential. A single speedlight with a small softbox or grid can replicate this classic lighting rembrandt style, creating cinematic portraits that add significant value to the final gallery.
Working with Natural Light on Location
To achieve consistent results with natural light, focus on positioning and control. Guide your subjects to stand where the window light falls across them, not directly on them. In a hotel suite, a simple five-in-one reflector can be used to gently lift the shadows, with the white side providing a subtle fill. The key is to actively seek out these 'sweet spots' of light in corridors, doorways, and alcoves, transforming ordinary spaces into extraordinary portrait locations.
Building a Professional Wedding Portfolio
In the competitive UK wedding market, which supports over 15,000 professional photographers, technical mastery is a critical differentiator. Integrating a selection of dramatically lit portraits demonstrates a higher level of artistry and justifies a premium price point. These images provide a 'distinction' level finish to a wedding gallery. For photographers looking to refine these skills, the Institute’s Wedding Photography Portfolio Builder Workshop offers a structured environment to practise such advanced techniques under expert, tutor-led guidance.

Mastering the Nuances: Modifiers and Face Shapes
Achieving the classic Rembrandt triangle is a significant milestone. Yet, true mastery lies beyond the basic setup; it requires a nuanced understanding of how light quality and facial anatomy interact. The character of your portrait is defined not just by the placement of your light, but by its texture, its intensity, and its relationship with your subject. This is where you elevate a technical exercise into a genuine art form.
The choice between soft and hard light is your first critical decision. A large softbox, positioned close to the subject, will create gentle, flattering shadows with a soft transition from light to dark. This approach is often favoured for corporate headshots or classic portraiture. In contrast, a smaller light source, like a silver reflector or a bare strobe, produces hard-edged, defined shadows. This creates a grittier, more dramatic mood, perfect for character studies or stylised fashion images. The distance of your light is equally crucial. The Inverse Square Law dictates that as you move a light source closer to your subject, its intensity increases exponentially and the light becomes relatively softer. For instance, moving a light from 2 metres to 1 metre away quadruples its intensity, creating a rapid, dramatic falloff that is central to the powerful lighting rembrandt style.
Choosing the Right Modifiers
Your choice of light modifier is what gives your light its specific personality. Each tool offers a distinct quality, allowing you to sculpt the shadows with precision. Consider these primary options:
The Beauty Dish: This modifier produces a unique quality of light that is soft but with a crisp edge. It is ideal for creating a defined, sculpted Rembrandt triangle, making it a favourite for fashion-forward wedding photography and stylised portraits.
The Umbrella: Often the first modifier a new photographer acquires, the umbrella is wonderfully forgiving. A large, white shoot-through umbrella delivers a broad, soft light that minimises skin texture, making it an excellent choice for beginners or for portraits of older subjects.
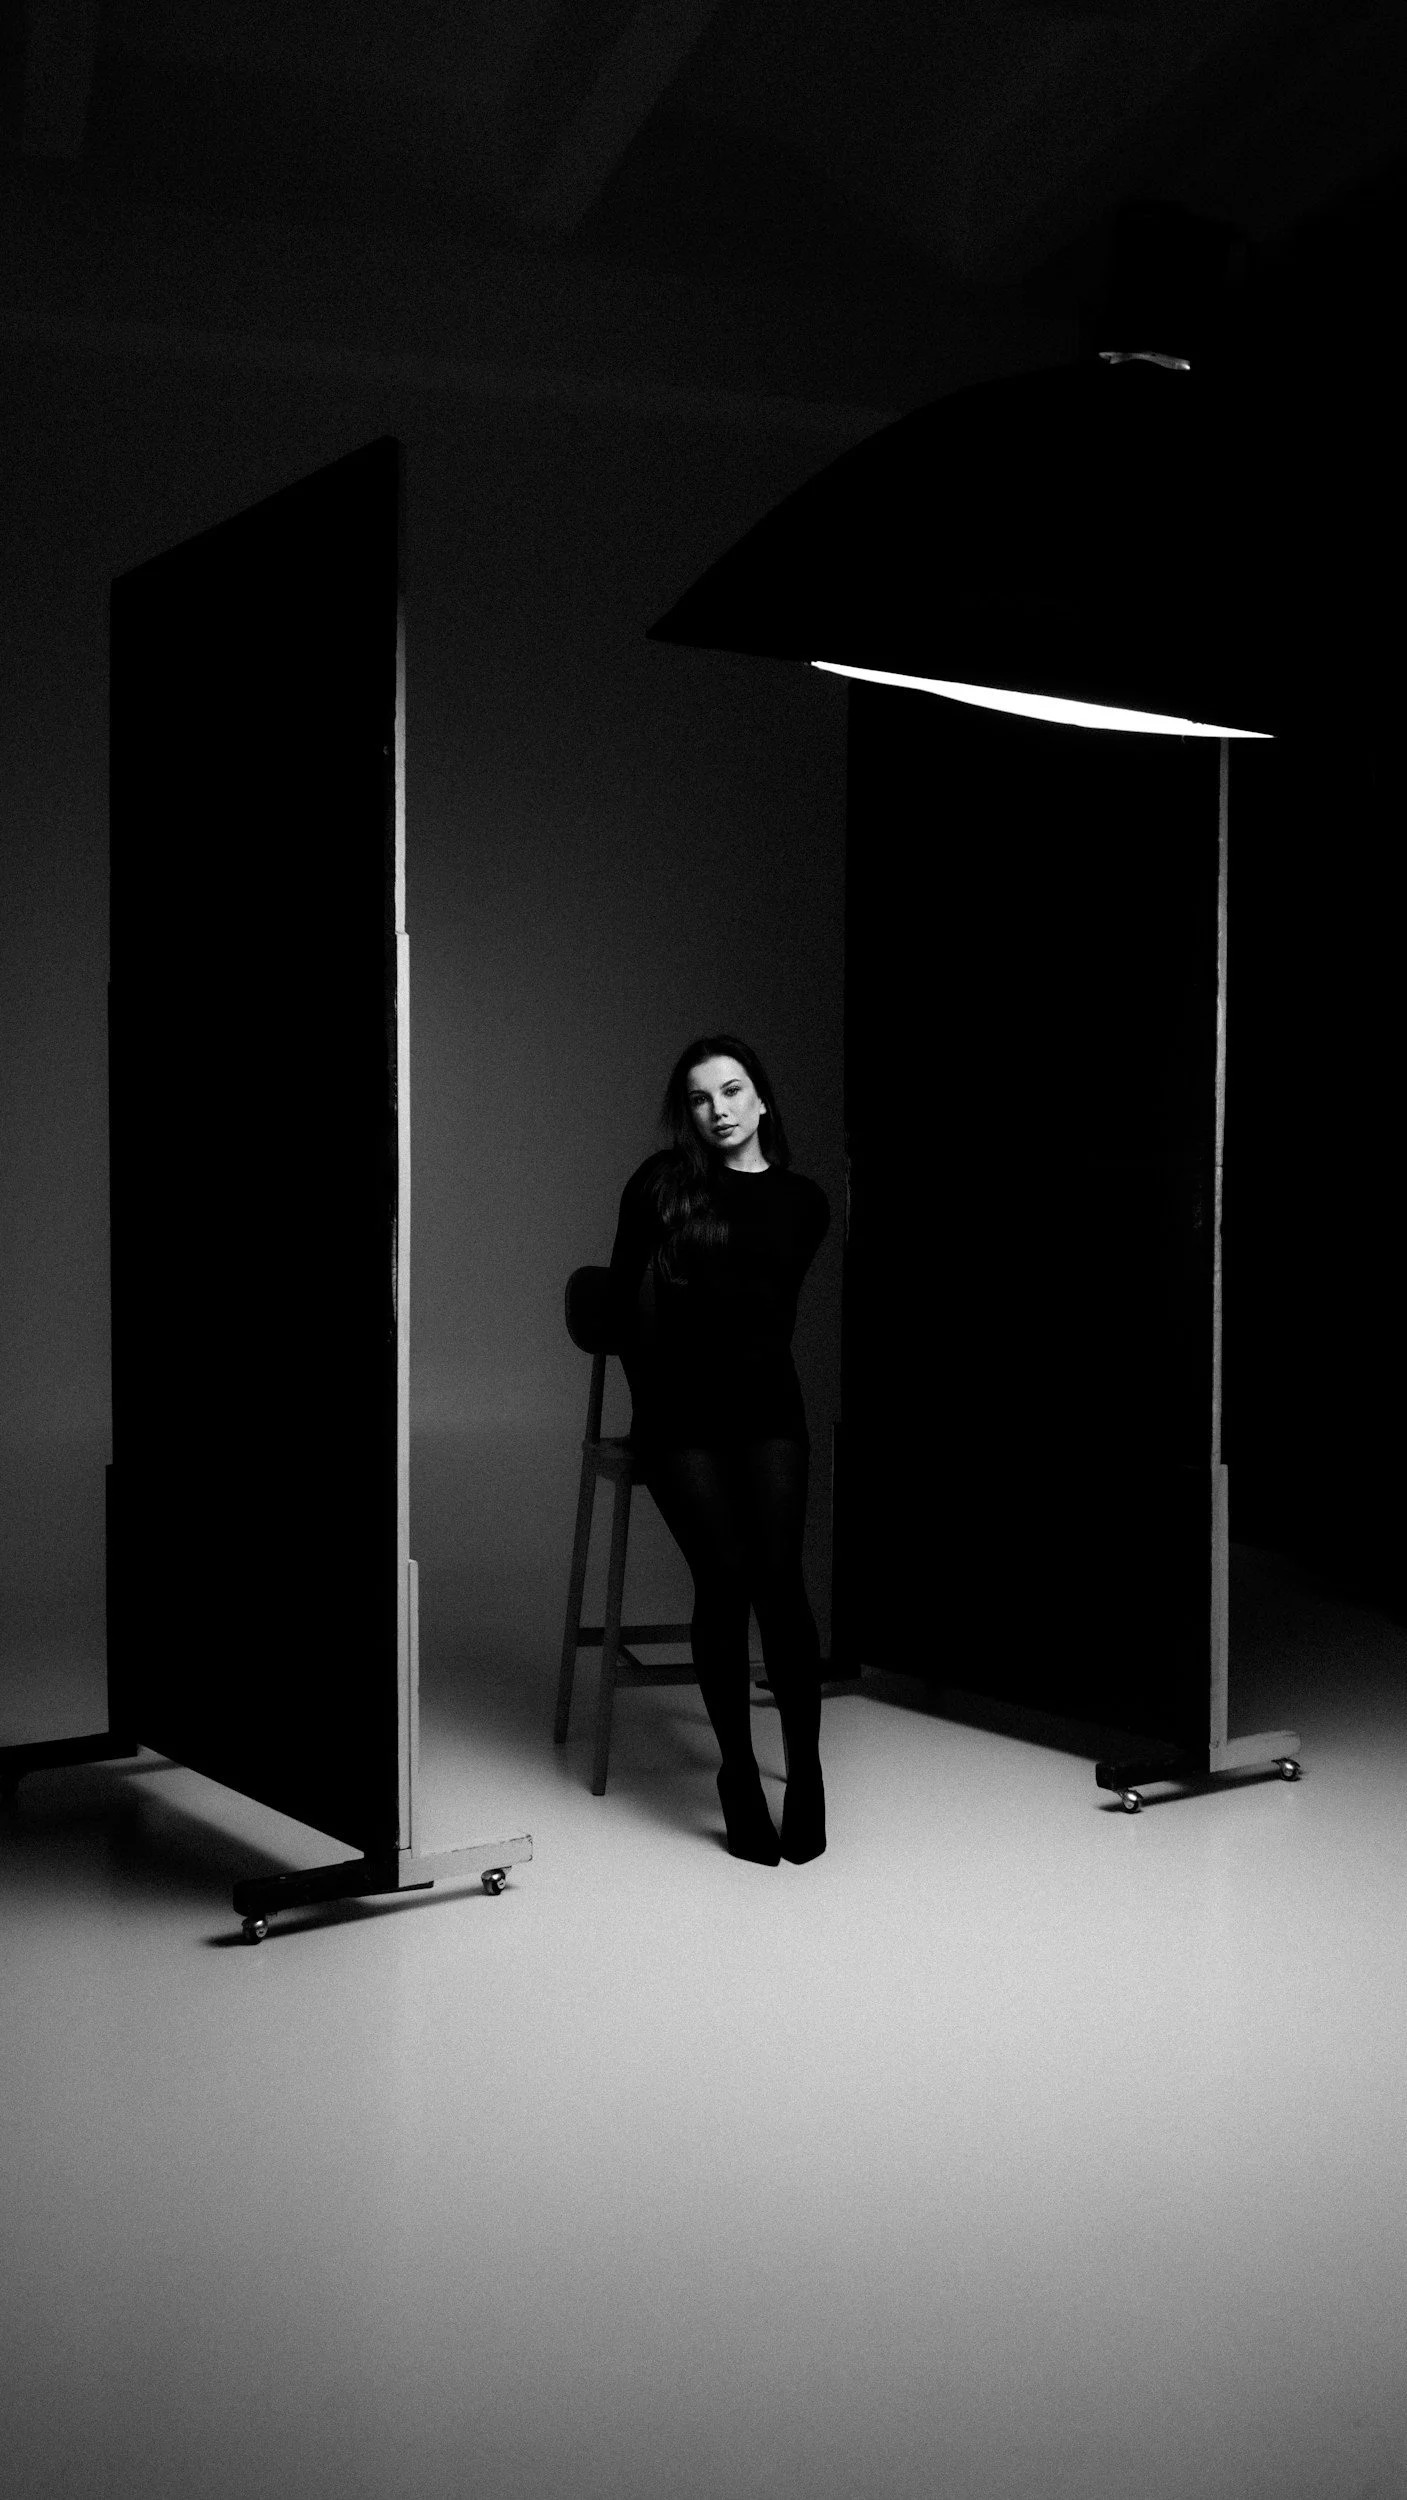
Grids and Snoots: When you need absolute control, these are your instruments. A grid or a snoot attaches to your light to narrow the beam, preventing it from spilling onto the background. This technique is essential for creating low-key portraits where the face emerges dramatically from a dark canvas.
Tailoring the Light to the Subject
A portrait is a collaboration, and a rigid lighting formula rarely serves every face. You must adapt your technique to complement your subject's unique features. For individuals with rounder faces, raising the key light slightly higher than the standard 45-degree angle will elongate the facial shadows, producing a natural, slimming effect. A common challenge is preventing the nose shadow from connecting with the shadow on the cheek; if this happens, the signature triangle is lost. To correct it, simply raise your light source or move it slightly more towards the camera's axis until a clean separation appears.
Special considerations are vital for achieving a professional result. For subjects with deep-set eyes, a high key light can create dark, unflattering sockets, often called 'dead eyes'. Lowering the light or introducing a small reflector from below can introduce a vital catchlight. Similarly, when photographing a subject with glasses, raising the light source and adjusting its angle can eliminate distracting glare. Ultimately, the position of the triangle must be tailored to the individual's bone structure to avoid unflattering shadows. This responsive approach transforms a good portrait into an exceptional one.
To refine your portraiture skills with personalised, tutor-led feedback, explore our accredited photography programmes.
Refining Your Craft with The Institute of Photographers
Understanding the theory behind a classic lighting setup is an essential first step. Yet, the transition from technical knowledge to creative intuition is where true artistry is forged. It’s one thing to follow a diagram; it’s another entirely to feel the way light sculpts a face and to adjust it instinctively to evoke a specific mood. This is the journey from competence to mastery, a path that is best navigated not alone, but with the structured guidance of a recognised mentor.
At the Institute of Wedding Photographers, we provide the framework for this transformation. Our approach is built on the belief that feedback is the most critical element of creative growth. A recognised tutor can identify the subtle nuances you might miss, such as the precise angle that turns a good portrait into a profound one, or the delicate balance of shadow that conveys strength rather than severity. Through our Academy programme, we integrate these timeless artistic principles with the demands of modern commercial reality, ensuring your skills are not only refined but also relevant.
From Theory to Mastery
True understanding is achieved through doing. Our tutor-led workshops are designed around intensive, hands-on practice, moving you beyond online tutorials into a dynamic learning environment. You will have access to professional models and the opportunity to shoot in unique historic locations across the UK, allowing you to build a portfolio that demonstrates genuine skill. This practical application solidifies your learning, helping you to move past the ‘standard’ setup and begin developing a unique artistic voice that is truly your own.
Your Path to Professional Accreditation
Mastering a technique like lighting rembrandt portraits does more than just enhance your portfolio; it elevates your professional standing. The ability to create such evocative and technically sound images is a key differentiator, particularly in a competitive field like wedding photography. A powerful portrait using this method could be the centrepiece of a winning submission to our prestigious Wedding Photography Awards, demonstrating a command of light that judges actively look for. This level of skill is a hallmark of the professionals we accredit.
Becoming part of a professional guild like the Institute of Wedding Photographers signifies a commitment to the highest standards of the craft. It provides you with the credibility, community, and continuous development needed to build a sustainable and respected career. We believe that formalising your talent through structured training and accreditation is the most direct path to achieving distinction and industry recognition.
If you are ready to transform your passion into a profession, we invite you to take the next step. View our upcoming wedding photography training dates in the UK and begin your journey toward mastery today.
Elevate Your Craft: From Rembrandt Theory to Professional Practice
You've now explored the anatomy of this timeless technique, from its precise setup to its powerful application in wedding portraiture. Understanding that the classic triangle of light is just the beginning is crucial. Mastering the nuances of lighting rembrandt isn't simply about following a diagram; it’s about sculpting with shadow to evoke emotion and depth, a skill that truly distinguishes a professional's work.
Putting this knowledge into practice is the definitive next step. We invite you to elevate your professional edge by joining our next Wedding Photography Workshop. This is your opportunity to receive direct, tutor-led feedback from industry masters and build your portfolio in some of the UK's most prestigious locations. As a programme fully recognised by the International Organization of Wedding Photographers, it provides the accreditation your talent deserves.
Begin the journey to transform your passion into a respected and successful craft.
Frequently Asked Questions About Rembrandt Lighting
What is the main difference between Rembrandt lighting and loop lighting?
The defining difference lies in the treatment of the nose shadow. In true Rembrandt lighting, the shadow cast by the nose connects with the shadow on the cheek, which forms a distinct, closed triangle of light on the less illuminated side. By contrast, loop lighting creates a small 'loop' of shadow from the nose that points towards the corner of the mouth but does not connect to the main cheek shadow, resulting in a less dramatic effect.
Do I need a studio strobe to achieve Rembrandt lighting, or can I use a speedlight?
You can certainly achieve professional Rembrandt lighting with a speedlight. While a studio strobe provides more power and faster recycle times for high-volume work, a single off-camera speedlight is entirely sufficient for creating this pattern. When paired with a modifier like a small softbox or an umbrella, a speedlight offers the precise control required to shape the light and shadow, making it an excellent and portable tool for mastering the technique.
How do I ensure there is a catchlight in the eyes when using Rembrandt lighting?
Creating a catchlight is a direct result of your key light's position. You must place the light source high enough so its reflection appears in the upper portion of your subject’s eyes, typically at the 10 o'clock or 2 o'clock position. This small specular highlight is crucial; it brings a sense of life and dimension to the portrait. If catchlights are absent, your light is likely positioned too far to the side or is not high enough.
Is Rembrandt lighting suitable for all face shapes?
While this technique is highly effective, it is most flattering for subjects with oval or diamond-shaped faces and defined cheekbones. The deep shadows can sometimes accentuate the width of a round face or overly slim a narrow one. However, a skilled photographer can adapt the setup by modifying the light's angle or introducing a fill reflector to soften the contrast, making it workable for a wider range of facial structures. It requires careful assessment of the individual.
Can Rembrandt lighting be used for group photos or is it strictly for individuals?
Rembrandt lighting is a technique designed almost exclusively for individual portraiture. Its precise nature requires meticulous placement of a light source relative to one subject to create the specific shadow pattern. Attempting to apply this to multiple people in a group would be exceptionally difficult and impractical. For groups, photographers typically employ broader lighting schemes, such as using a large, diffused light source to ensure even illumination for everyone.
What should I do if the nose shadow is too long and touches the lip?
If the nose shadow extends down to touch the lip, it is a clear indication that your key light is positioned too high. To correct this common error, you simply need to lower your light source incrementally. As you bring the light down, you will observe the shadow shortening and separating from the lip, allowing you to correctly form the signature triangle of light on the cheek. This adjustment is a fundamental step in refining your portrait.
How do I achieve Rembrandt lighting using only natural window light?
You can create an excellent Rembrandt setup using a single window as your light source. Position your subject so the window is at an approximate 45-degree angle to their face. You may need to use a curtain or a black card to 'flag' off part of the light, narrowing the beam to increase control and create the necessary shadow. A white reflector placed on the opposite side of your subject can be used to gently lift the shadows to the desired level.
Why is Rembrandt lighting considered a 'must-know' for wedding photographers?
This technique is essential for wedding photographers because it provides a reliable method for creating dramatic, timeless, and flattering portraits with minimal equipment. In a fast-paced wedding environment, the ability to quickly craft a painterly portrait of a bride or groom using a single off-camera flash is a significant professional asset. It elevates the final wedding album, showcases technical mastery, and delivers high-value, artistic images that clients cherish.